Re-registering Students onto a new schedule in Bulk
In this article, you will find steps on how to re-register students for the next academic year.
This is a custom add on feature. Please contact your CRM to learn more
Duplicating a schedule
Log in as an admin
In the left menu, go to courses > schedules
Hover over the schedule that you want to duplicate to re-register students
In Actions, click the ‘Duplicate for Re-register' button
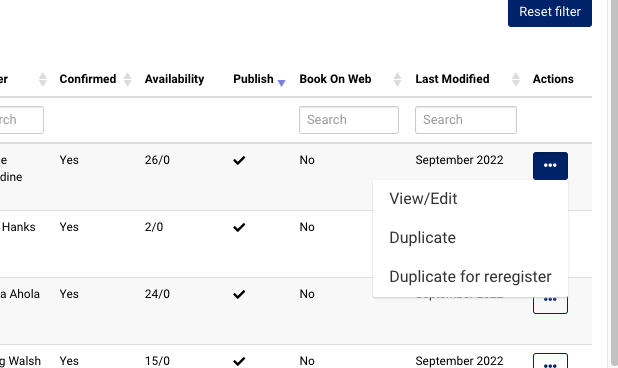
The duplicated schedule will now be opened in a new tab
Edit the title of the duplicated schedule
You can view the academic year for the duplicated schedule in the summary tab
In the Summary tab, you can edit details if needed as follows:
Location: choose from the dropdown
Sub Location: choose from the dropdown
Staff: Choose another trainer from the dropdown
Secondary trainers: Select secondary trainers for the schedule
Schedule Note: You can add a schedule note if needed
Please note that the timeslot frequency will be duplicated as well when you duplicate a schedule
Select the blackouts for the new academic year - see user guide on how to add
In Timeslot tab, you can edit details as follows:
Start Date: Select a start date for the duplicated custom frequency
End Date: Select an end date for the duplicated custom frequency
Click on ‘Generate Timeslots’ button to generate custom frequency timeslots for the selected date range
Do not edit any details for the ‘Bookings' and ‘Fees’ tabs
Click ‘Save’ button to save the Schedule
Outcome: The schedule has been created with the same timeslots as the year before.
Re-registering students i.e. rebooking them onto the same slots
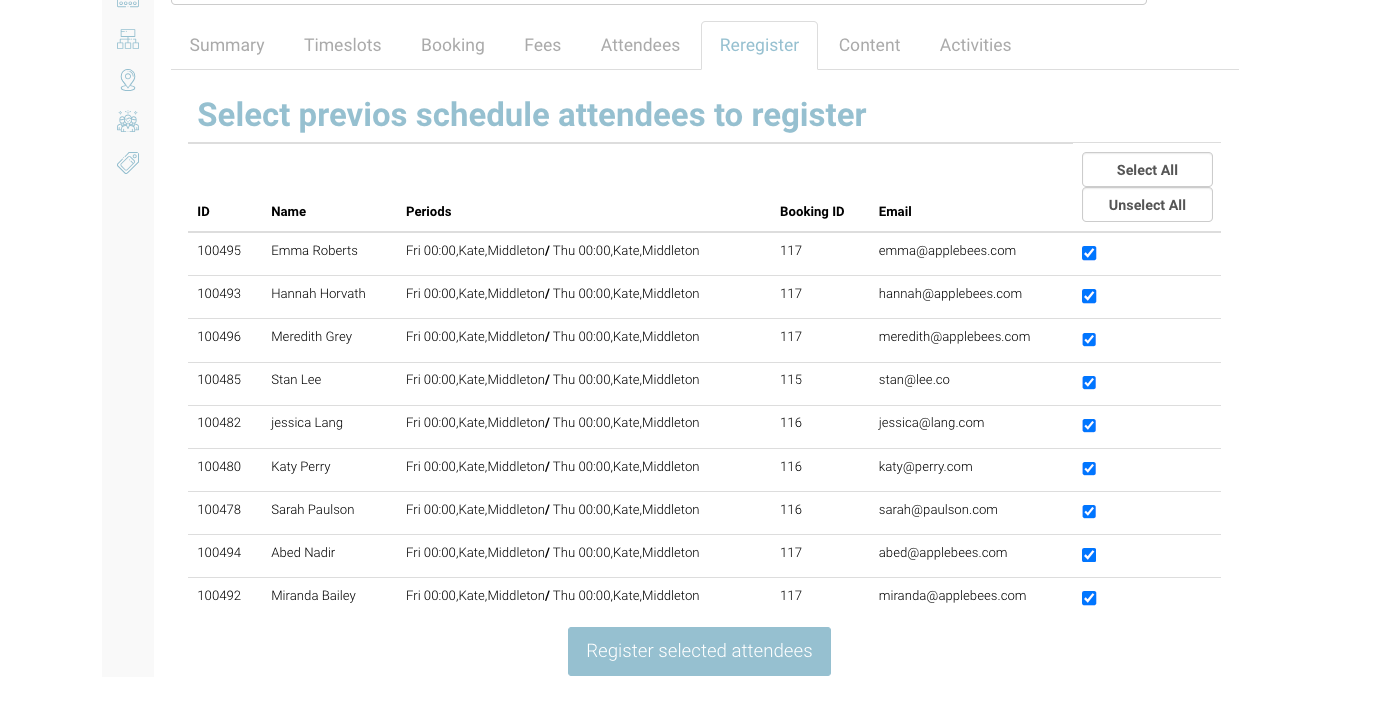
When the schedule is duplicated over and admin edits and saves the schedule, you can see the ‘reregister’ tab in the schedule. To re-register students as attendees, please follow these steps:
Open the saved duplicated schedule
Go to ‘Reregister’ tab
All students will be pre-selected. De-select the students who will not be attending the same timeslots as the previous academic year
Click on ‘Register Selected Students’ button
Outcome:
The students will be registered on the schedule. You can see the registered students in the ‘Attendees tab’
A new booking will be created for the reregistered students
If you re-registered someone by mistake, you can cancel the booking in admin > bookings.
Rebook student onto a different schedule or timeslot i.e. student has changed the day of the week they are attending
In this case, the student is still attending their classes for the new academic year, but they will be attending at a different time or day of the week or even schedule. You will not book them on via the above steps. Please follow this scenario below.
Login as admin
Open bookings
Search the contact name
Go to the previous academic year booking
Without selecting the booking, navigate to the actions column
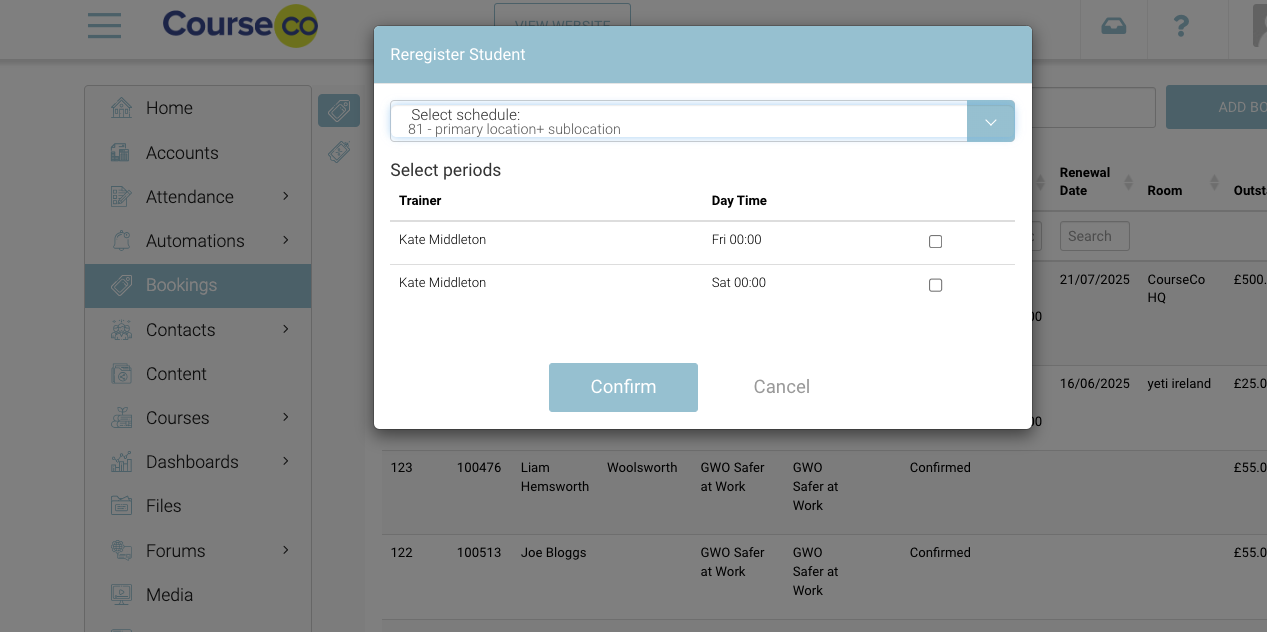
Select Register
From the popup, search the valid schedule
Select the timeslot(s) the student will be attending
Select Book
Outcome: the student will be booked onto the schedule with the assigned timeslots.
Register new Enquiry booking
With the custom integration with DCS. CourseCo will receive DCS Confirmed contacts and their confirmed booking. This new booking, will display in CourseCo as booking status Enquiry. This means, this booking is new i.e. this contact has not been on a previous schedule on CourseCo.
Convert Enquiry booking into a confirmed booking.
Login as admin
Go to Bookings
Search the booking eg type Enquiry into the search or search the students name.
While staying on the booking list screen, select the actions dropdown
Select Register
From the popup, search the valid schedule
Select the timeslot(s) the student will be attending
Select Book
Outcome: the student will be booked onto the schedule with the assigned timeslots.