The functionality for blackouts is to ensure that you don’t schedule a course to run on a bank holiday or for other unique reasons.
Applying a blackout to a schedule ensures admin won’t schedule anything to run on these blackout dates to avoid any issues. You can use the Blackout feature while creating a schedule. Below are the steps to creating blackouts for schedules:
This feature is not on by default as most clients do not require this step. Typically used for clients who offer very large schedule eg 1 year of training. Contact us to get this free feature installed.
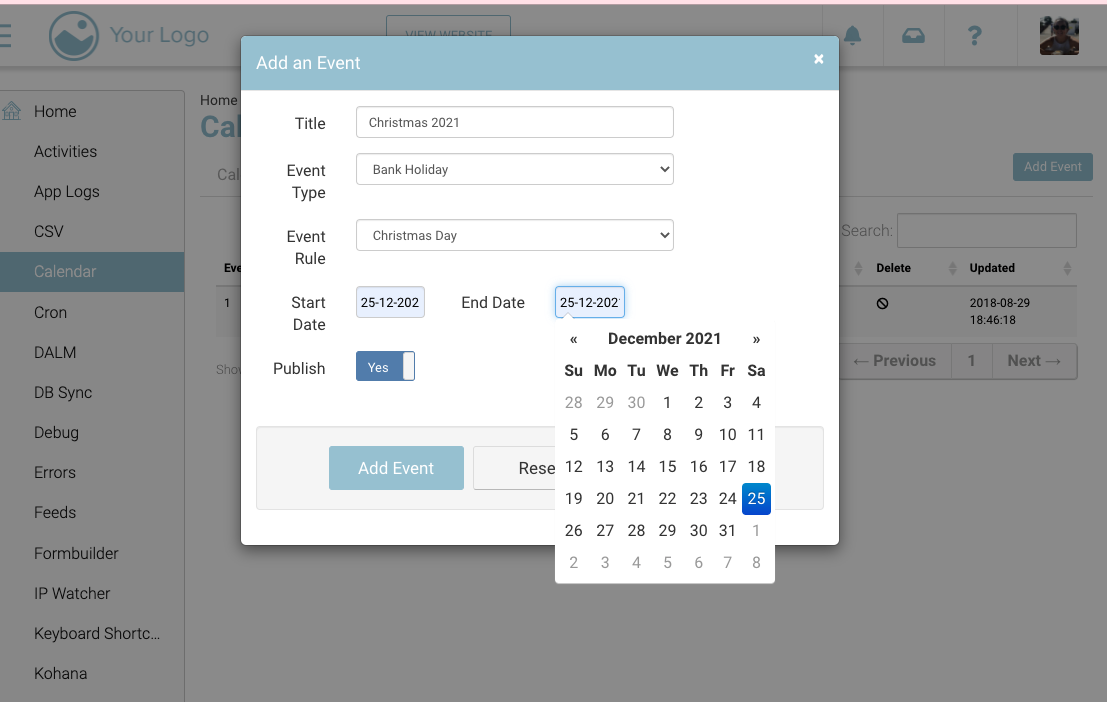
Step 1: New academic year | Creating a blackout
-
Login as an admin
-
Open courses
-
Navigate down the left menu to Calendar
-
From here create your Blackout
-
Select the Events tab
-
Add your event eg 'Christmas 2026'
-
Add event type (previously added) eg ‘Bank Holiday’
-
Add event RULE eg ‘Bank Holiday’
-
Set start date & end date
-
Select Add Event
Deleting or editing previously added/outdated blackouts is okay. You can edit the previously added blackout for the upcoming year to make adding blackouts faster!
Step 2: Selecting the black in a schedule
New Schedules | Creating a new schedule will automatically select the blackout by default.
Existing Schedules | Existing schedules will have the blackout de-selected and will require a manual update and re-generation of slots.
-
Navigate to courses > schedules
-
Click on Create a new schedule
-
Add information to the Summary tab
-
In the Timeslots tab > Select blackouts
-
By default, blackout is selected, deselect if not required.
-
-
Enter Details in Bookings, Fees and Content Tab. Click Save
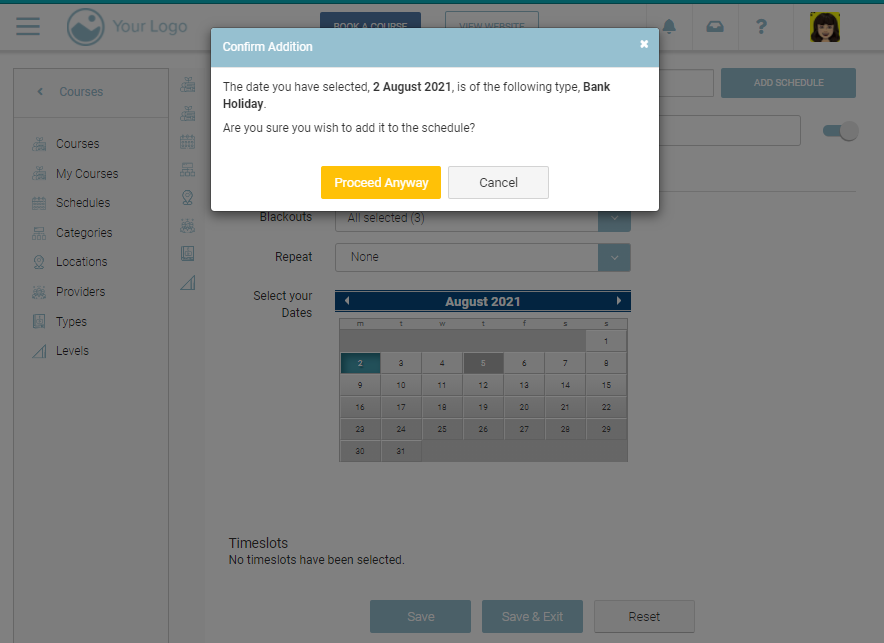
Outcome: If admin selects a blackout date the admin will be alerted of this issue.