A trainer-led schedule is used when your course runs on specific dates and times with a trainer assigned (e.g. classroom or live online training).
When to Use This
Use this when creating a course that runs on fixed dates with a trainer, location, and defined timeslots.
Create a Schedule
-
Log in as an admin
-
Navigate to Courses > Schedules
-
Click Add Schedule
The schedule setup screen will open.
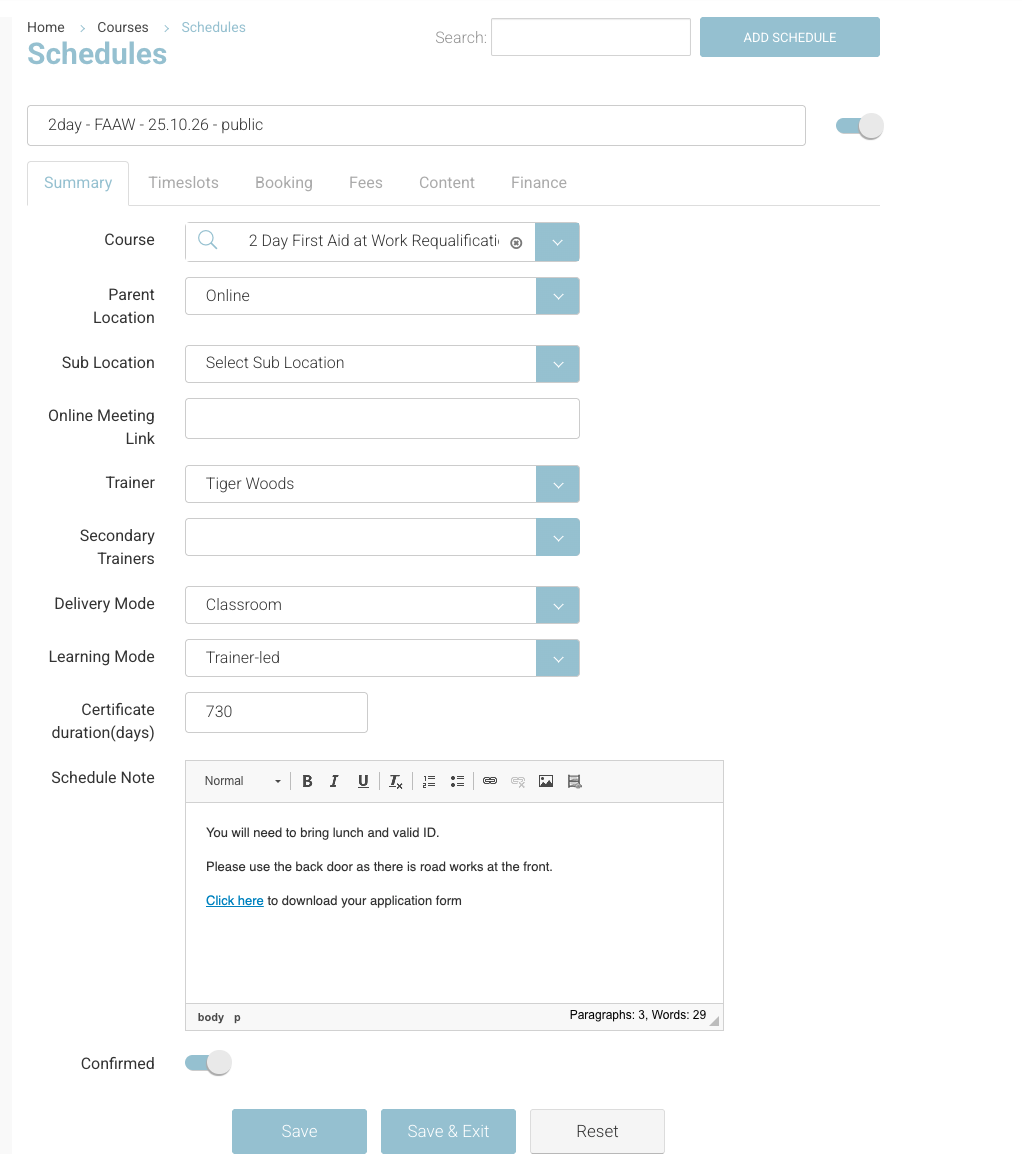
Step 1: Summary Tab
Populate the key details for your schedule:
-
Schedule Title
Internal only—use clear naming as this is searchable -
Course
Select the course this schedule belongs to - you created the course already - follow user guide here on creating a course -
Location / Sub-location
-
Select a physical location (e.g. Training Centre > Room 1) - adding locations, follow user guide here
-
OR enter an Online Meeting Link - enter the meeting link external url
-
-
Trainer
Select from the dropdown (must exist as a trainer contact) -
Delivery Mode
Select: Classroom / Blended / Online
Tip - useful later for reporting or altering automated emails based on delivery mode. -
Learning Mode
Select Trainer-Led (this enables timeslots) -
Certification Duration
Enter number of days (used for expiry tracking) eg 1 year = 365, 2 years 730 (don’t forget leap years) -
Schedule Note
Add joining instructions or important info (this populates into emails to booker/student) - full user guide here on Schedule Note
Note: You do not need to save before moving to the next tab.
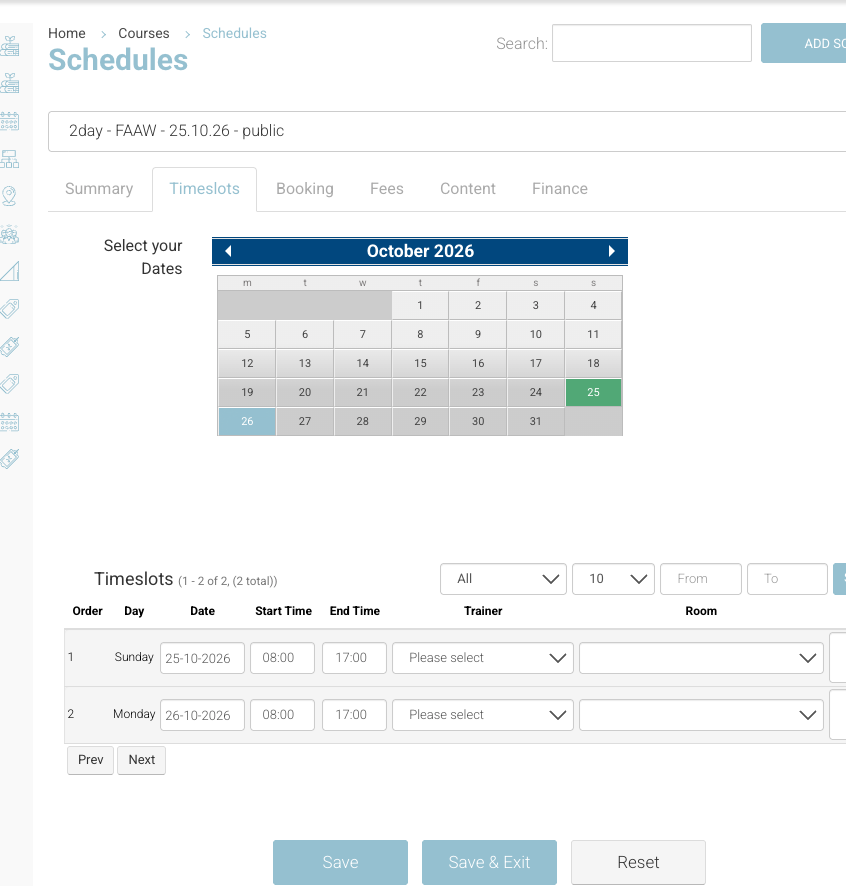
Step 2: Timeslots Tab
This is where you define the actual course dates and times.
Timeslots control:
-
Dates
-
Start and end times
-
Trainer - leave blank default added on the summary
-
Location - leave blank default added on the summary
Schedule | Timeslots
Option A: One-Off Schedule
-
Set Repeat = None
-
Manually select dates on the calendar
-
Enter:
-
Start time
-
End time
-
Trainer
-
Location
-
Option B: Repeating Schedule (if enabled)
-
Set Repeat = Custom
-
Select days of the week (e.g. Monday)
-
Click into each selected day
-
Add:
-
Start time / End time
-
Trainer
-
Location
-
-
Set Start Date and End Date
-
Click Generate Timeslots
-
Review and select required dates
Note: Time format is 24-hour (e.g. 13:00 = 1pm)
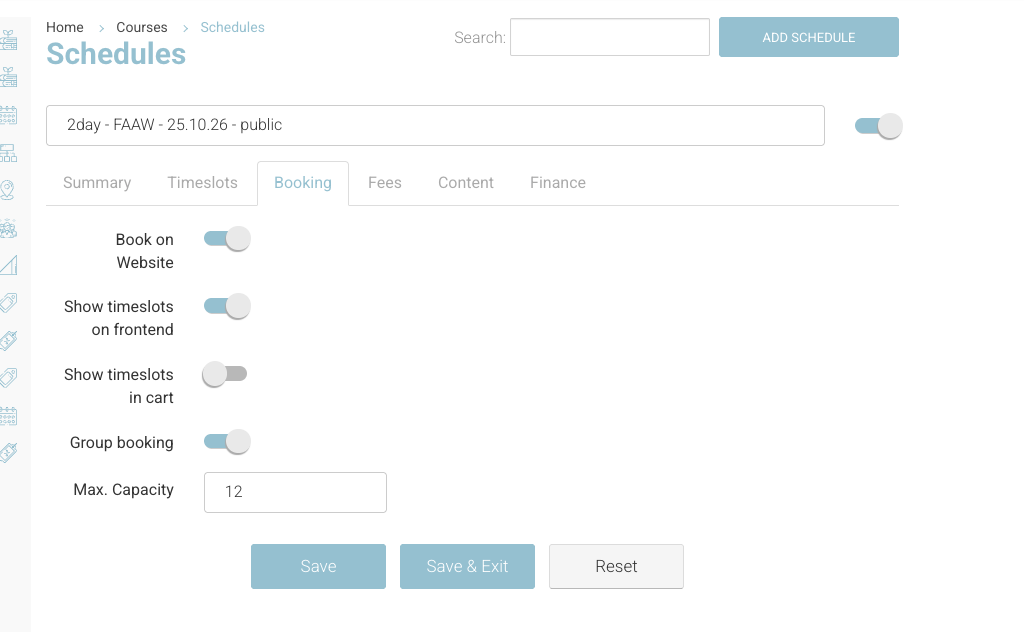
Step 3: Booking Tab
Define how users can book the schedule:
-
Book on Website
Enable to make the schedule visible online -
Show Timeslots on Frontend
Disable if you have a high number of timeslots -
Show Timeslots in Cart
Same logic as above -
Group Booking
Enable to allow bookings with multiple delegates -
Max Capacity
Set total number of spaces-
If set to 0 → waitlist will show
Schedules | Booking Tab
-
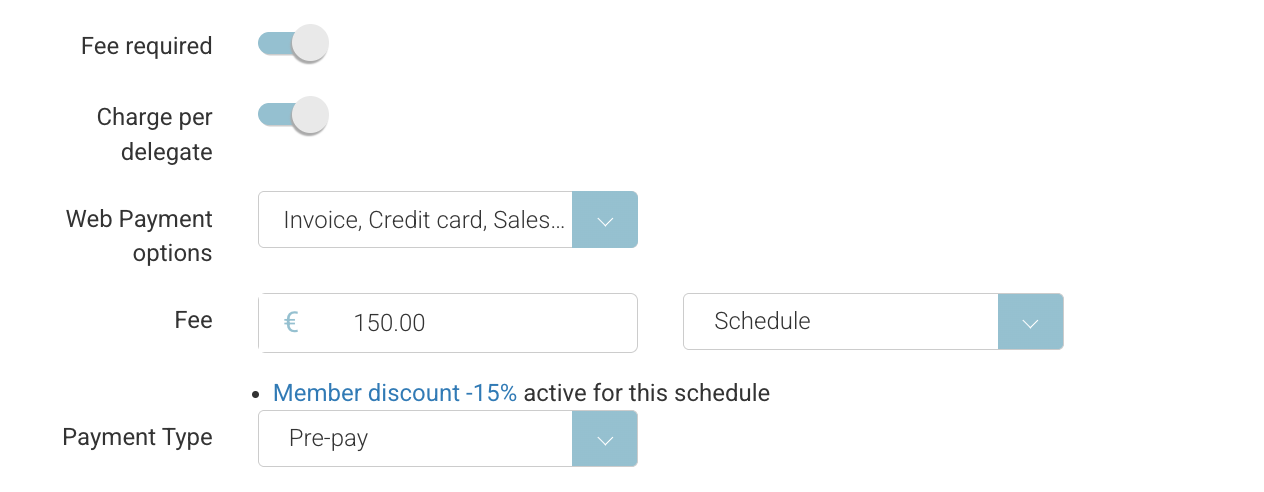
Step 4: Fees Tab
Set pricing and payment options:
-
Fees Required
Enable to charge for the course - disable if free -
Charge per Delegate
-
ON → price per person
-
OFF → fixed price (used for private/in-company bookings, see full user guide here)
-
-
Web Payment Options
Select:-
Invoice
-
Credit Card
-
Sales Quote (optional) - add on feature
-
-
Fee
Enter price
Save the Schedule
Click Save once all tabs are complete.
Outcome
-
The schedule is created with a unique ID
-
Timeslots are added to the timetable
-
Bookings can now be created
-
Schedule can be duplicated if needed
-
If Book on Website = Yes, it will appear on your website
Important Notes
-
You must select Trainer-Led to enable timeslots
-
Always complete Timeslots before saving
-
Ensure pricing is correct before going live
-
Trainer must exist as a contact to be selectable
Recommended Tips
-
Use consistent naming for schedules (e.g. “Manual Handling – May 2026”)
-
Double-check timeslots—this is the most common source of errors
-
Review the schedule on the frontend after saving to confirm visibility