A self-paced schedule is one in which there is no trainer imparting training and the student can study at his own pace. Also, there are no timeslots as there is no trainer and no online meeting link for the students. However, the content will be available for a set time period only within which the student should complete studying the material. To create a self-paced schedule, follow the steps given below:
-
Navigate to Courses > Schedules.
-
On the Schedules page, click ADD SCHEDULE.
The page to add a new schedule will be displayed.
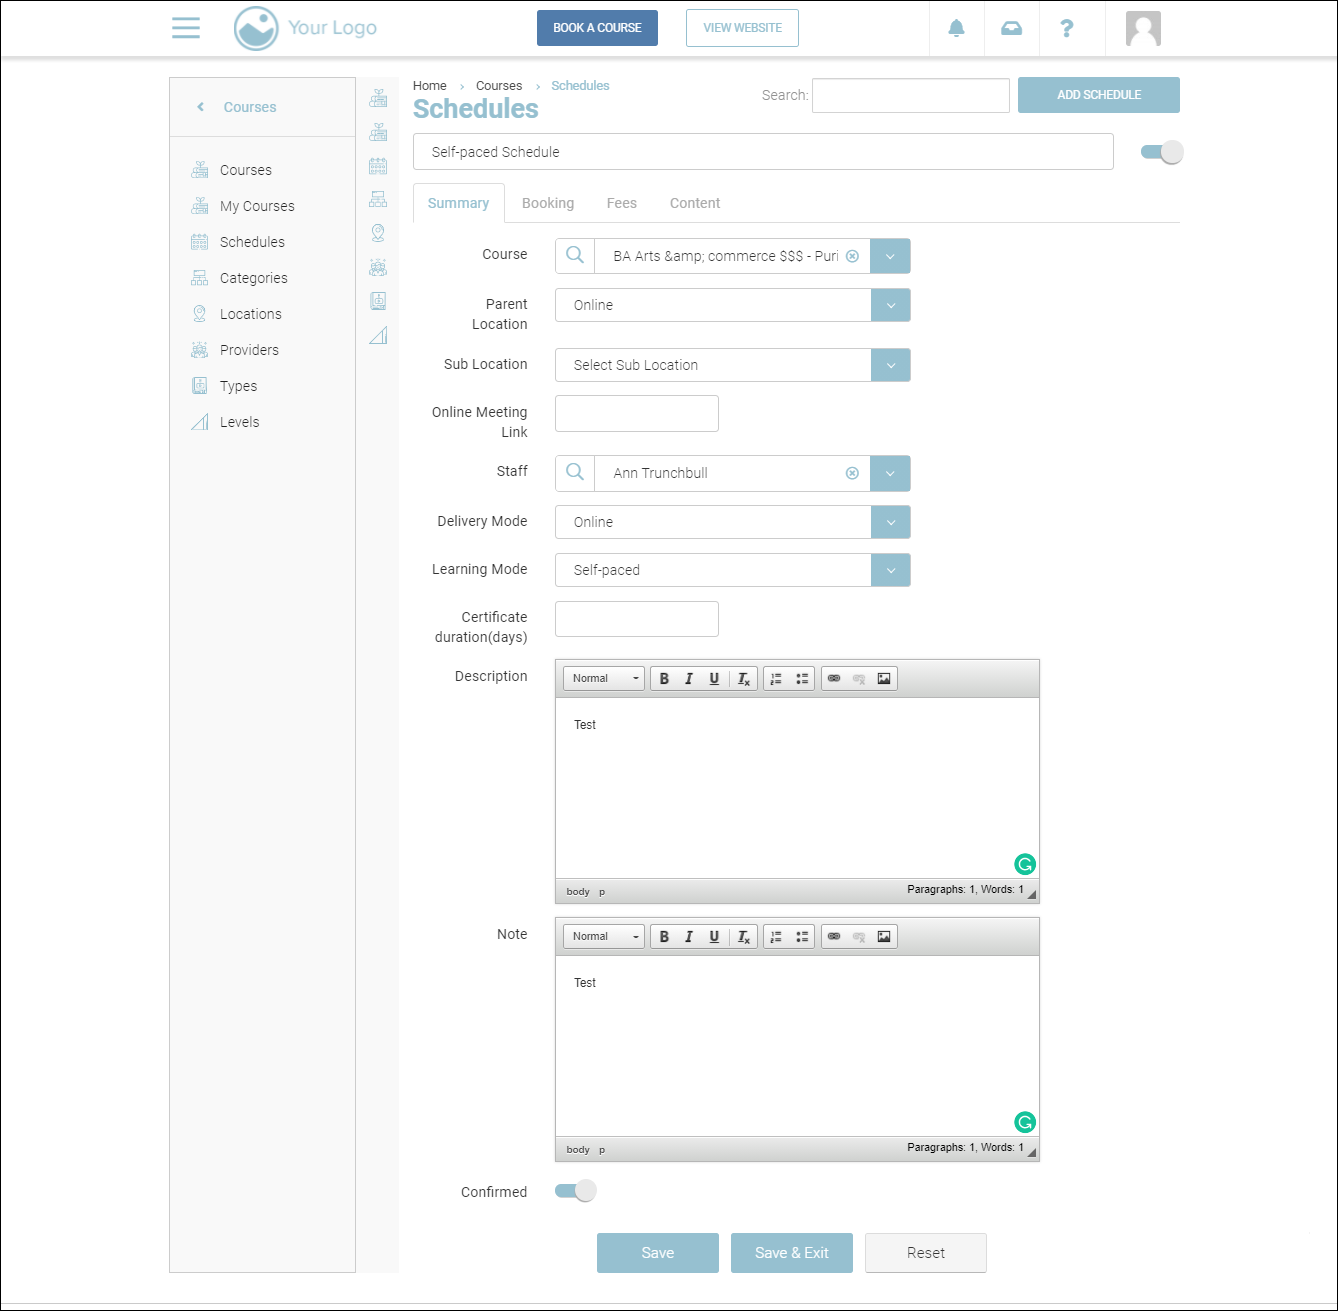
3. Enter the Schedule Title.
There are 4 tabs for which you have to enter/select values for the fields.
Summary
The next step is to populate values for the fields of the Summary tab. A Summary is a short description that provides information about the subject matter, approach, breadth, applicability of the course, and course details.
-
Select the Course for which you are creating the schedule.
-
Select the option Online from the Parent Location dropdown list.
-
Select the sub-location from the Sub Location dropdown list.
-
Select the trainer who would be imparting the training from the Staff dropdown list if any. (Optional)
A self-paced schedule will not have an online meeting link as it is not necessary.
-
Select the option Online from the Delivery Mode dropdown list.
-
Select the option Self-paced from the Learning Mode dropdown list.
-
Enter the number of days for the certification in the Certification Duration field.
-
Enter a brief description of the course in the Description field. This is not mandatory.
-
Enter any information related to the schedule in the Note field.
To see how our Note feature works, please visit To use the Notes feature, please visit https://help.courseco.co/kb/Adding-a-Note-on-Schedules.2464612355.html
-
Enable the Confirmed switch if the schedule is confirmed.
-
Click Save.
The summary details will be saved.
-
Navigate to the Booking tab.
-
Enter/select the required values for the fields. Refer to Booking for field descriptions.
-
Navigate to the Fees tab.
-
Enter/select the required values for the fields. Refer to Fees for field descriptions.
The Timeslot tab will not show once you choose the Delivery mode as Self-Paced
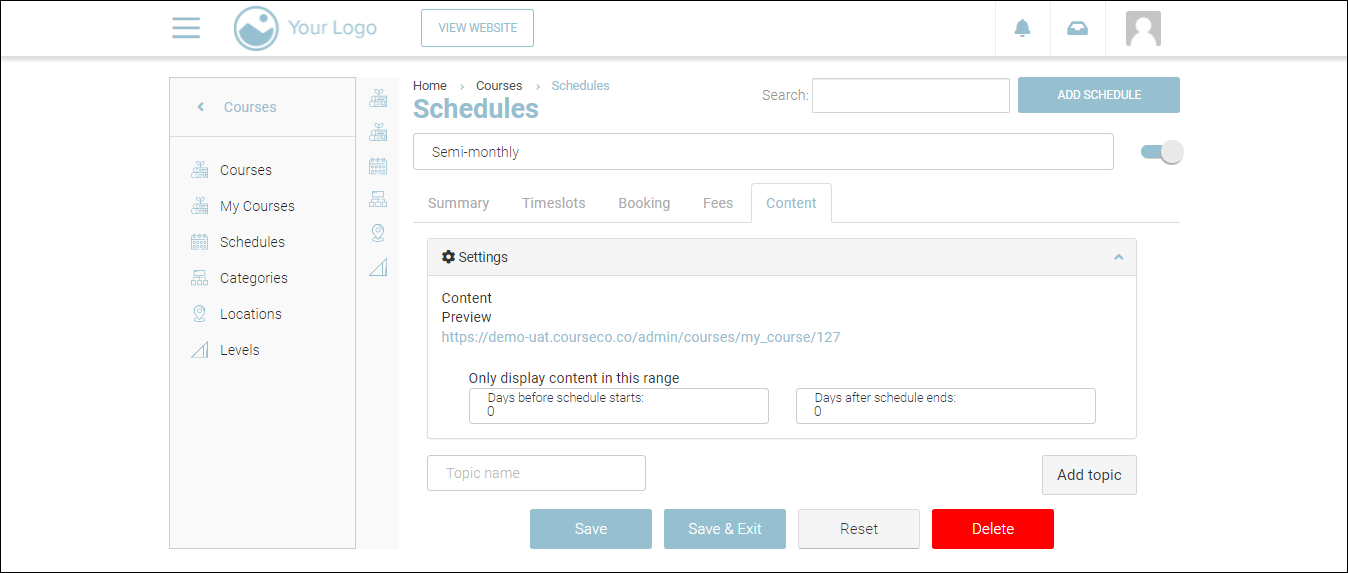
Content
-
Navigate to the Content tab.
The Content tab will be displayed. It allows you to manage E-Learning materials as well as determine the access time period for students. You can set the number of days during which you want the contents of the schedule will be available here.
-
Set the number of days during which you want the schedule content preview to be displayed in the Days before schedule starts and Days after schedule ends fields. This is the most important step in a self-paced schedule because the accessibility period of the study material is defined here.
-
To add a course topic, enter the topic name and click Add topic. For more information, refer to https://help.courseco.co/kb/E-Learning.2262204579.html ,
-
Enable the Allow Skipping switch if you want to allow students to skip topics.
-
Click Save.
Outcome:
-
A self-paced schedule will be created.
-
The schedule will be displayed on the website if Book on Website option is enabled.
-
Only one schedule can be created per event.
-
If users booked different events, then a new schedule should be created or the existing schedule can be duplicated.