Back Office Bookings - Individual & Group
Creating a Back Office Booking for an Individual
Back-office confirmation email triggers when the booking is edited to enter a PO number - see detailed User Guide
To create a back-office booking for an individual, follow the steps below:
Go to the website
Login as an admin
In profile picture dropdown, select ‘My account’ from the dropdown
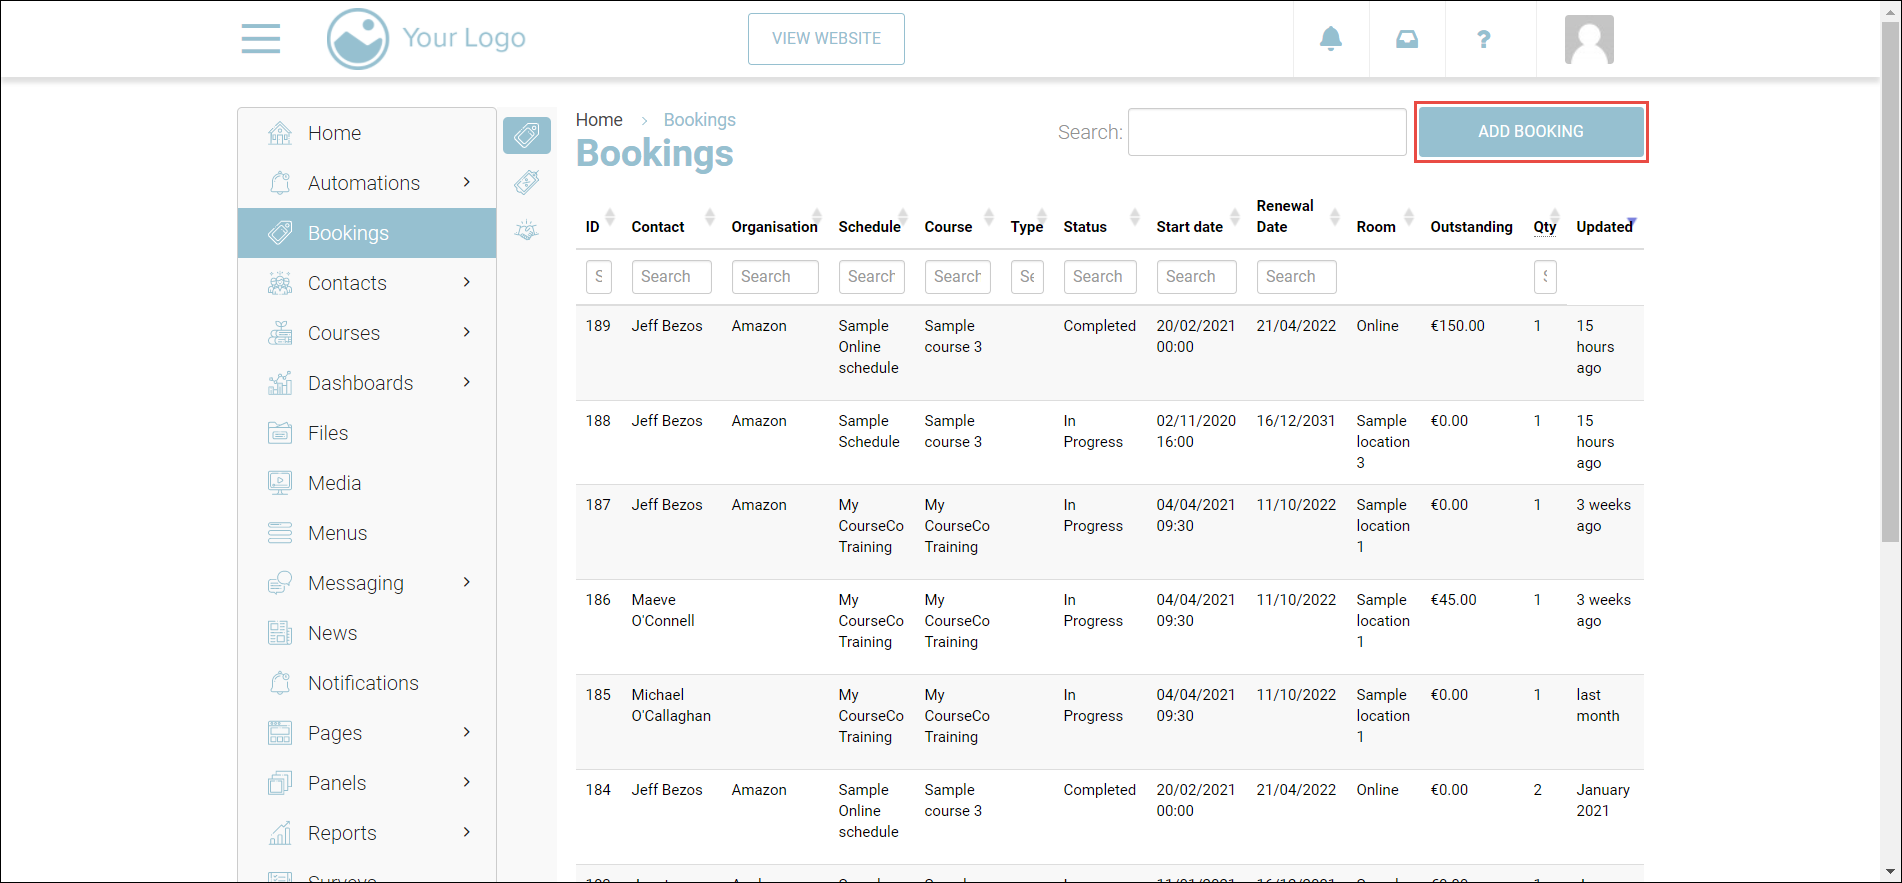
In left menu, go to ‘Bookings’ plugin

Click ADD BOOKING. The Create a new booking page will be displayed.

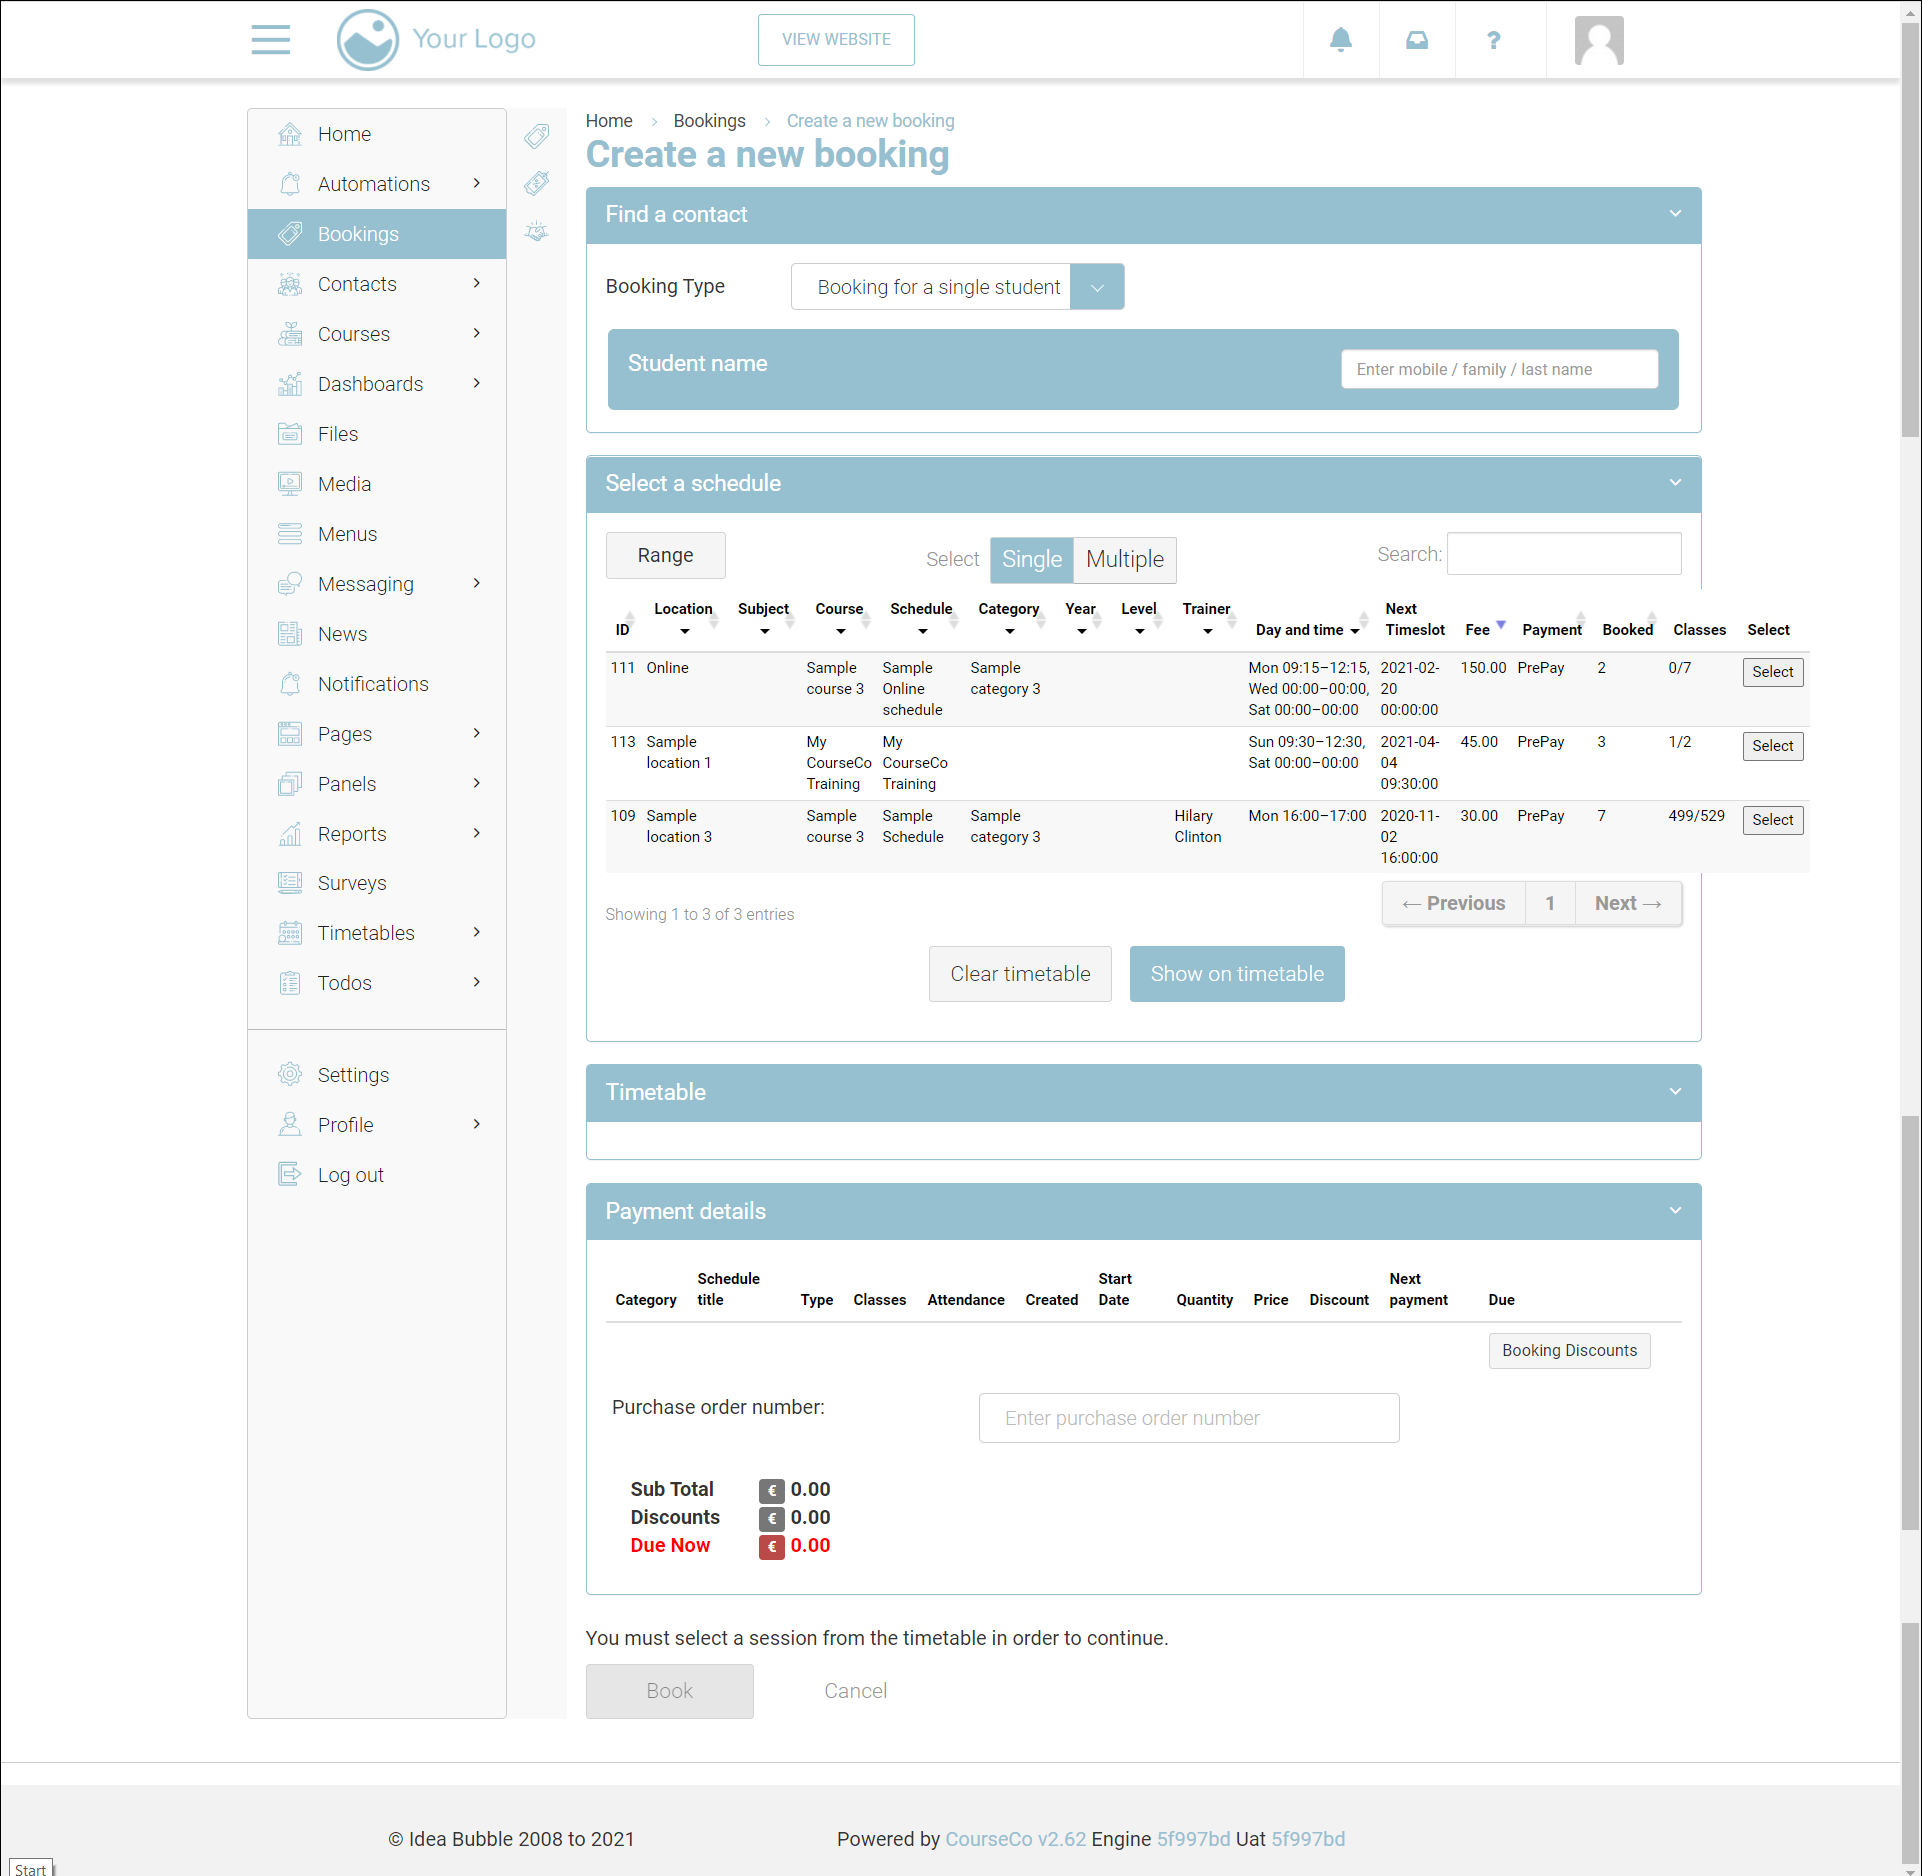
From the Booking Type dropdown list, select Booking for a single student.
In the Student name section, search the student’s contact for which you want to add a booking. Search by the student’s First/Last name or mobile number and select the student from the suggested contact list.
In the Select a schedule section, select the range of schedules that you want to view. You can filter the schedules by All, Past, Upcoming, Inprogress/ Upcoming
Select the schedule from the list by clicking on ‘Select’
You will be redirected to the Payment details section at the bottom of your screen. Review the payment information.
In the Purchase order number field, enter the relevant invoice number
Click on ‘Book’ button
Back-office confirmation email triggers when the booking is edited to enter a PO number - see detailed User Guide
Outcomes:
Booking will be confirmed.
An email will be sent to the delegate.
An invoice booking with an outstanding transaction will be created if pending payment.
The student can view the booking in their portal.
Timetables will be updated.
Attendance reports will be updated.
The booking will be reflected in the upcoming booking and revenue reports.
You can search a booking by entering delegate name in the global search bar on bookings list page
You can also search booking using schedule ID inside a booking for a contact who has multiple bookings
Creating a Back Office Group Booking
Back-office confirmation email triggers when the booking is edited to enter a PO number - see detailed User Guide
Booking for a group is created for organisations and their delegates with a lead booker linked primarily as a point of contact.
A back-office booking creates an outstanding transaction that updates after the back office booking has been made.
Go to the website
Login as an admin
In profile picture dropdown, select ‘My account’ from the dropdown
In left menu, go to ‘Bookings’ plugin

Click ADD BOOKING. The Create a new booking page will be displayed.

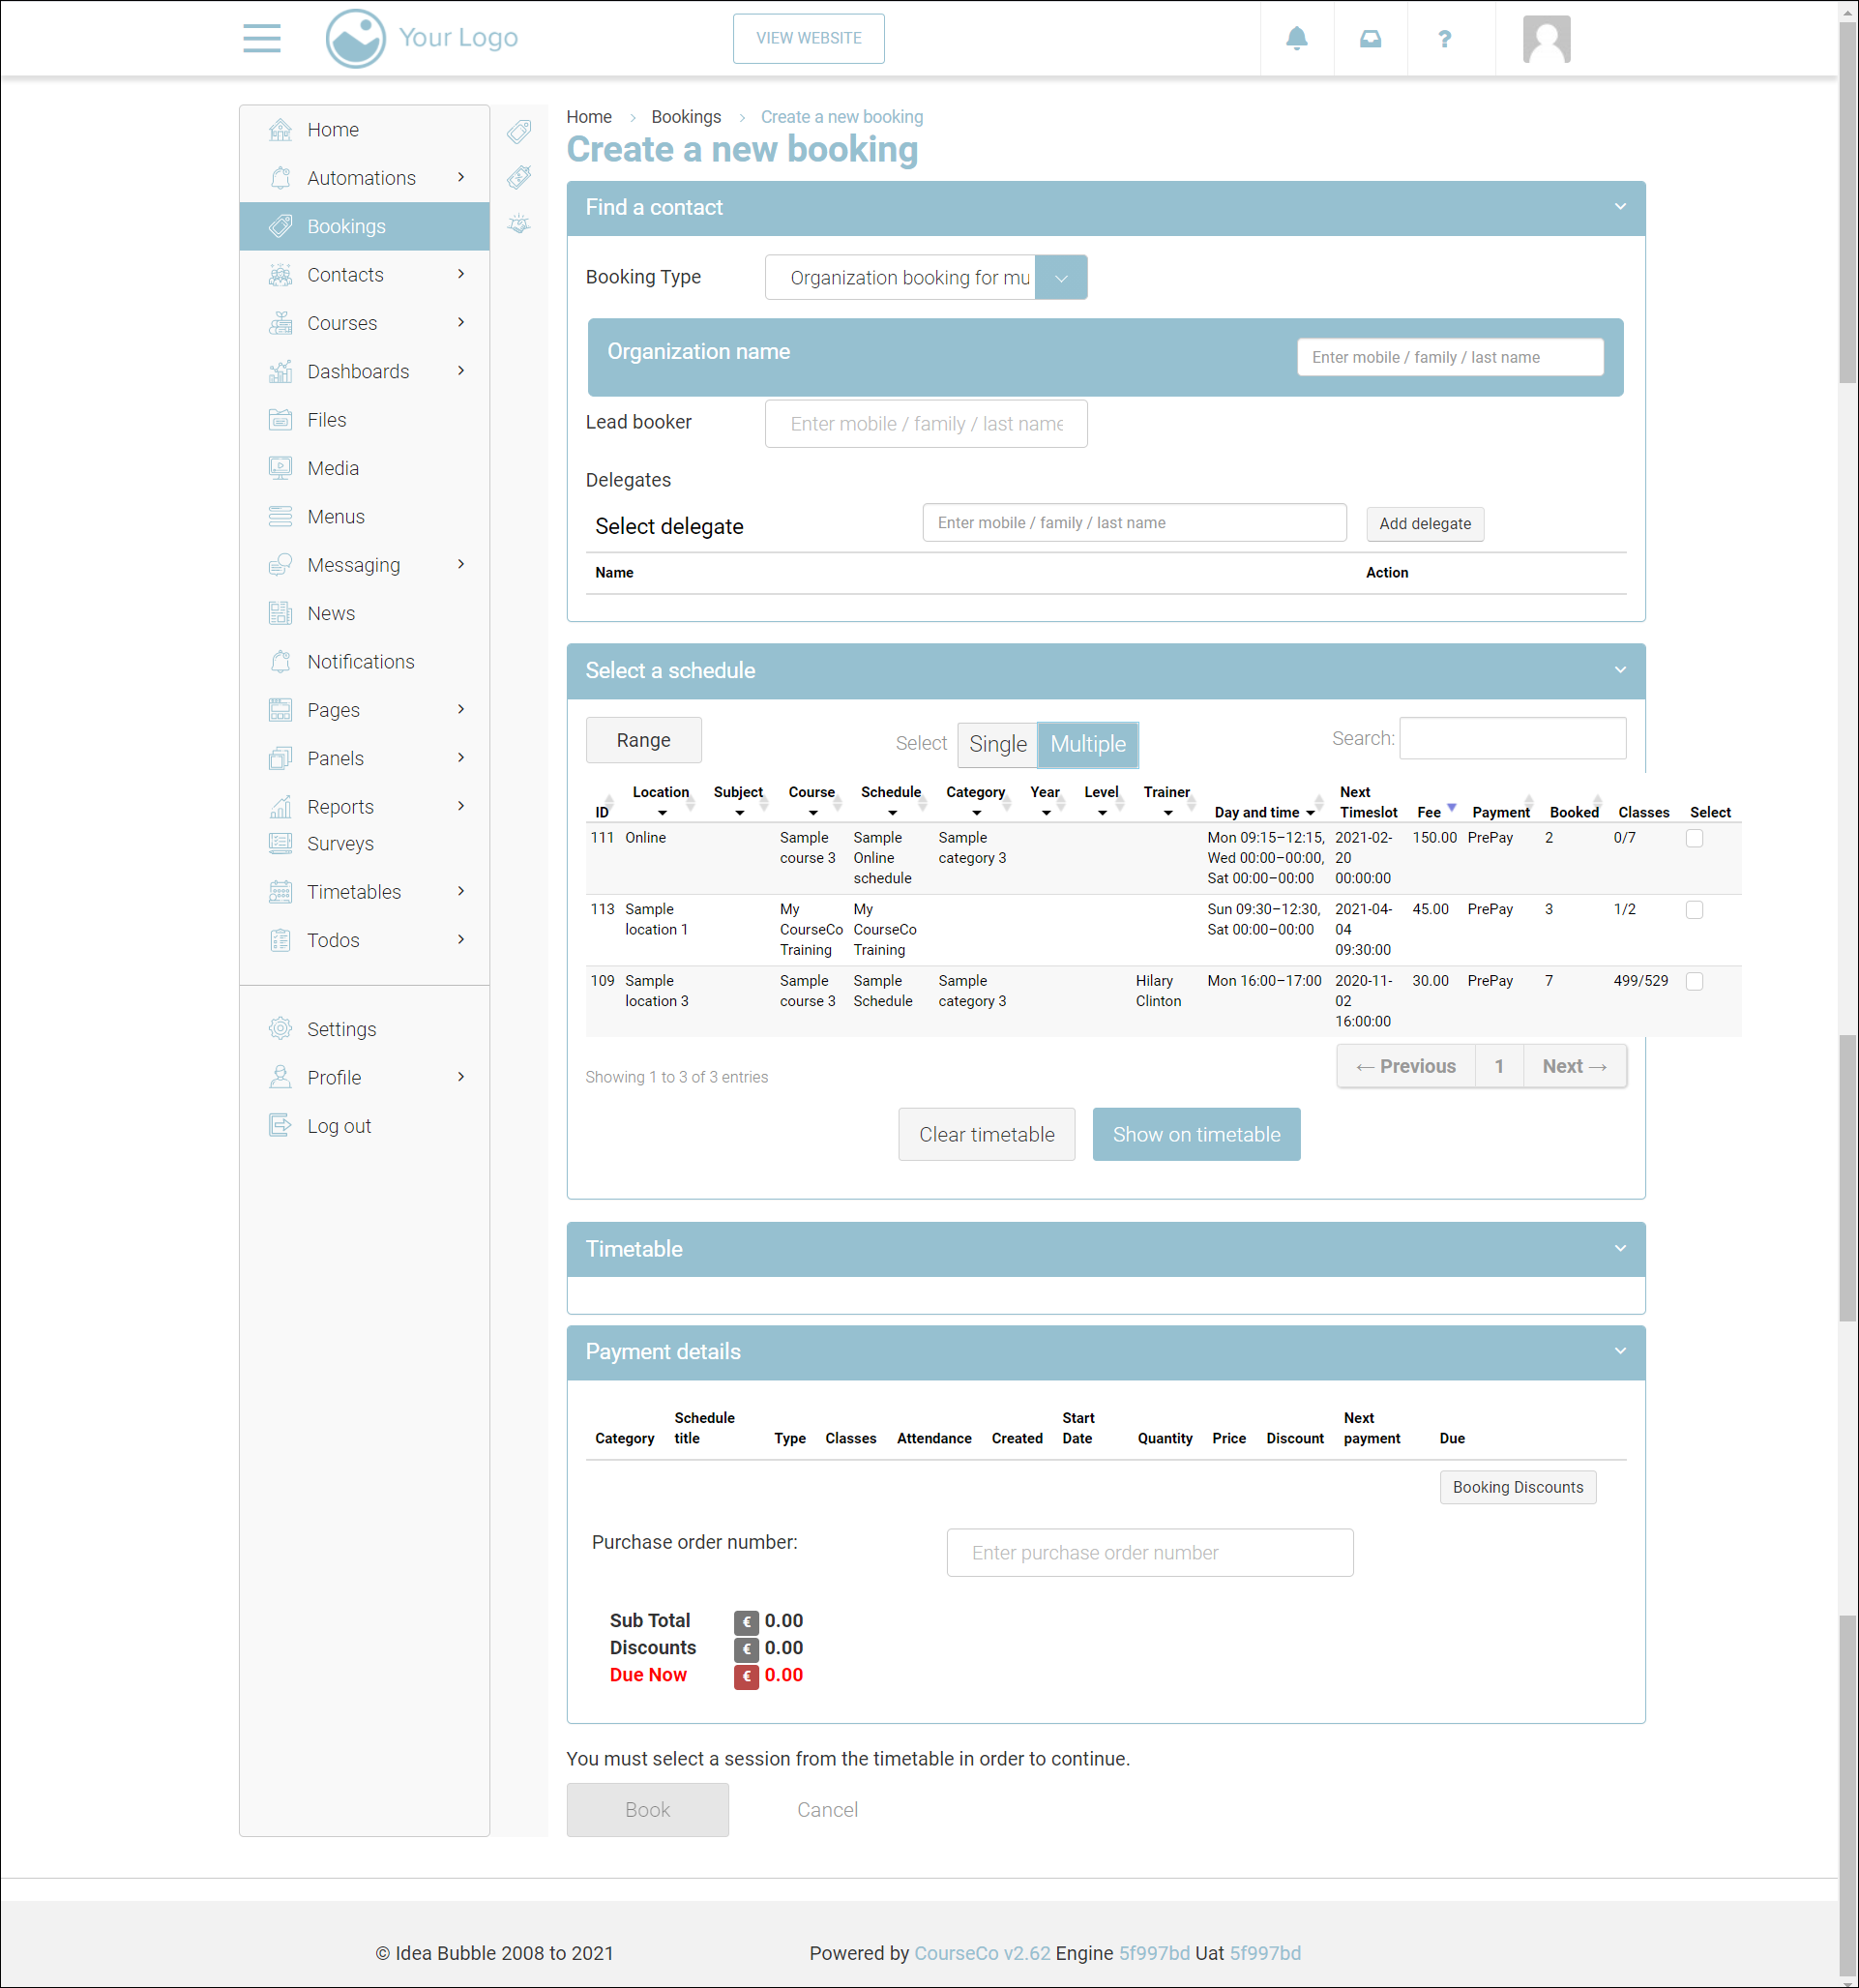
From the Booking Type dropdown list, select Organization booking for multiple delegates.
In the Organization name section, search and select the organization’s name for which you want to add the booking.
Search the leadbooker’s name for which you want to add a booking. Enter the leadbooker’s last name or first name.
Select the leadbooker’s name from the suggested contact list.
To add delegates, search and select the contact of the delegate in the Select delegate field and click Add delegate. Repeat this step for as many delegates you want to add to the course booking.
The lead booker and the delegates must be linked to the organisation in order to be available to select.
In the Select a schedule section, select the range of schedules that you want to view. Filter the schedules by All, Past, Upcoming, Inprogress/ Upcoming
Select the schedule from the list by clicking on ‘Select’
You will be redirected to the Payment details section at the bottom of your screen. Review the payment information.
In the Purchase order number field, enter the relevant invoice number
Click on ‘Book’ button
Outcomes:
Booking will be confirmed.
An invoice booking with an outstanding transaction will be created if pending payment.
A confirmation email will be sent to the lead booker with booking information.
An email will be sent to all delegates on the group booking.
Timetables will be updated.
Attendance reports will be updated.
The booking will be reflected in the upcoming booking and revenue reports.
