To allow CourseCo to send emails on your behalf, SMTP authentication (SMTP Auth) must be configured using valid credentials. CourseCo uses this connection to send automated emails from your organisation, such as booking confirmations, invoices, and certificates, often on a scheduled (hourly or daily) basis.
Because these emails are sent automatically, SMTP Auth cannot support two-factor authentication (2FA). 2FA requires manual interaction, which would interrupt and break the automated sending process. This is a limitation of how SMTP works for automated systems, not a restriction specific to CourseCo.
To maintain security while enabling email delivery, we recommend using a dedicated external SMTP provider.
Recommended option:
SMTP2GO (external provider)
Steps:
-
Create an SMTP2GO account Go to https://www.smtp2go.com/signup/
Create an account using your email address.
Verify the account from the confirmation email you receive. -
Add your sending email/domain
Log into the SMTP2GO dashboard.
Go to Sending → Verified Senders.
Add the email address you want CourseCo to send from (e.g. training@yourdomain.com).
Follow the verification email they send to confirm the address.
If you prefer, you can verify your domain instead of a single email address. -
Get the SMTP credentials
In the dashboard, go to Sending → SMTP Users.
Create a new SMTP user.
Copy the following details:
SMTP Server:
mail.smtp2go.com
Port:
587
Username
Password
Send us the credentials from SMTP2GO
or
If feeling confident, Enter details into CourseCo yourself follow the steps below.
Contact us if you get blocked with anything in CourseCo!
-
Enter SMTP credentials into CourseCo
Login as Admin
Navigate to Messaging menu
On the left sub menu, select settings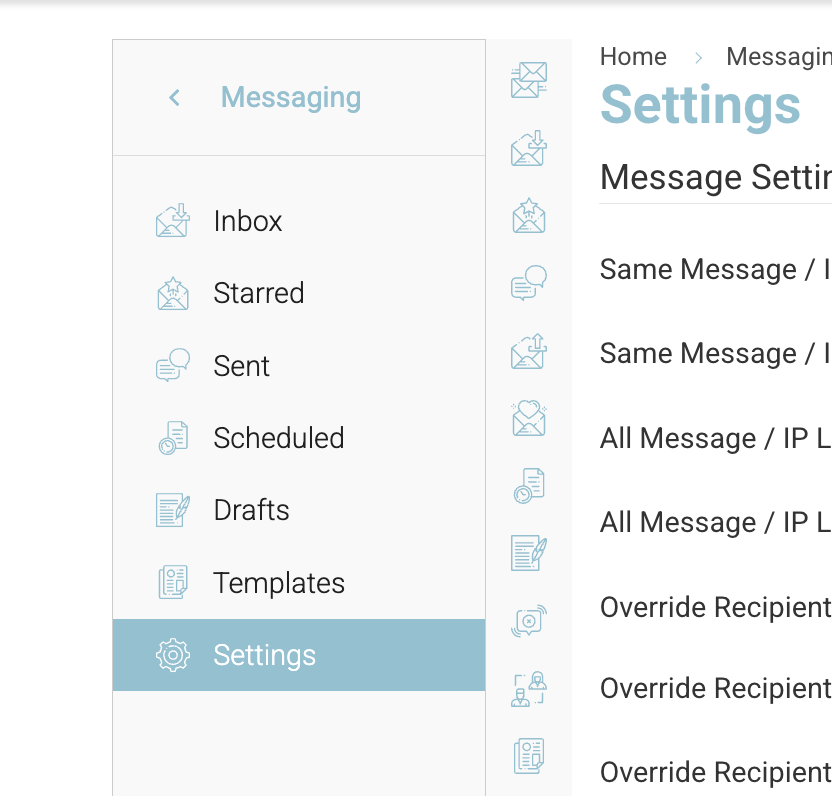
Messaging | settings
When in settings Enter in yout ‘PHPmail From Email’
(e.g. training@yourdomain.com)

Next, navigate to SMTP settings
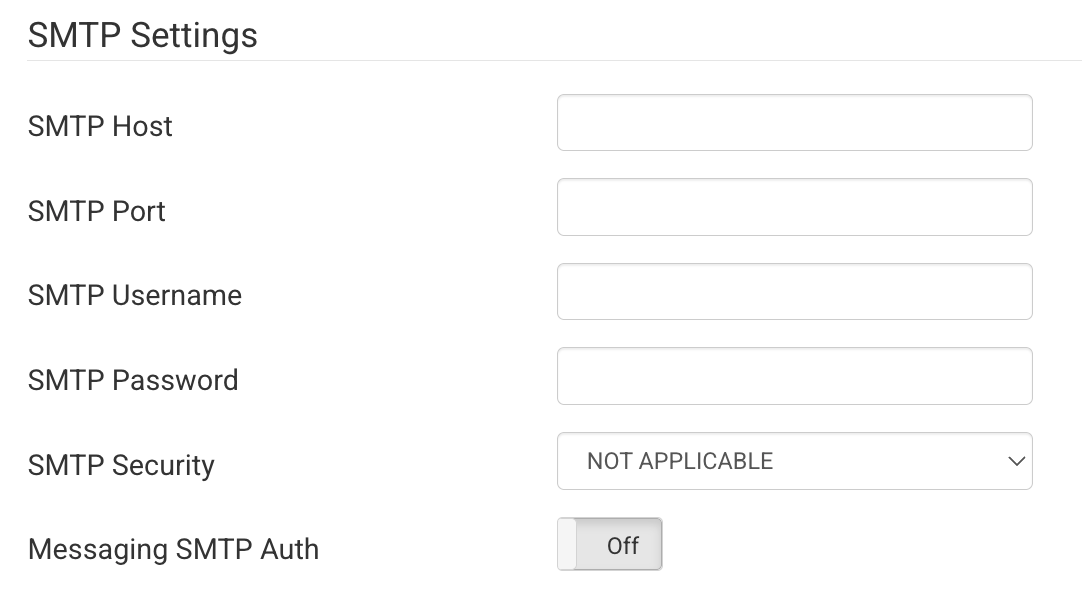
Enter in the details
EXAMPLE
Host: mail-eu.smtp2go.com (example)
Port: 2525 or 587 (example)
Username: your username
Password: *****
smtp security: tls
Messaging SMTP Auth: ON
-
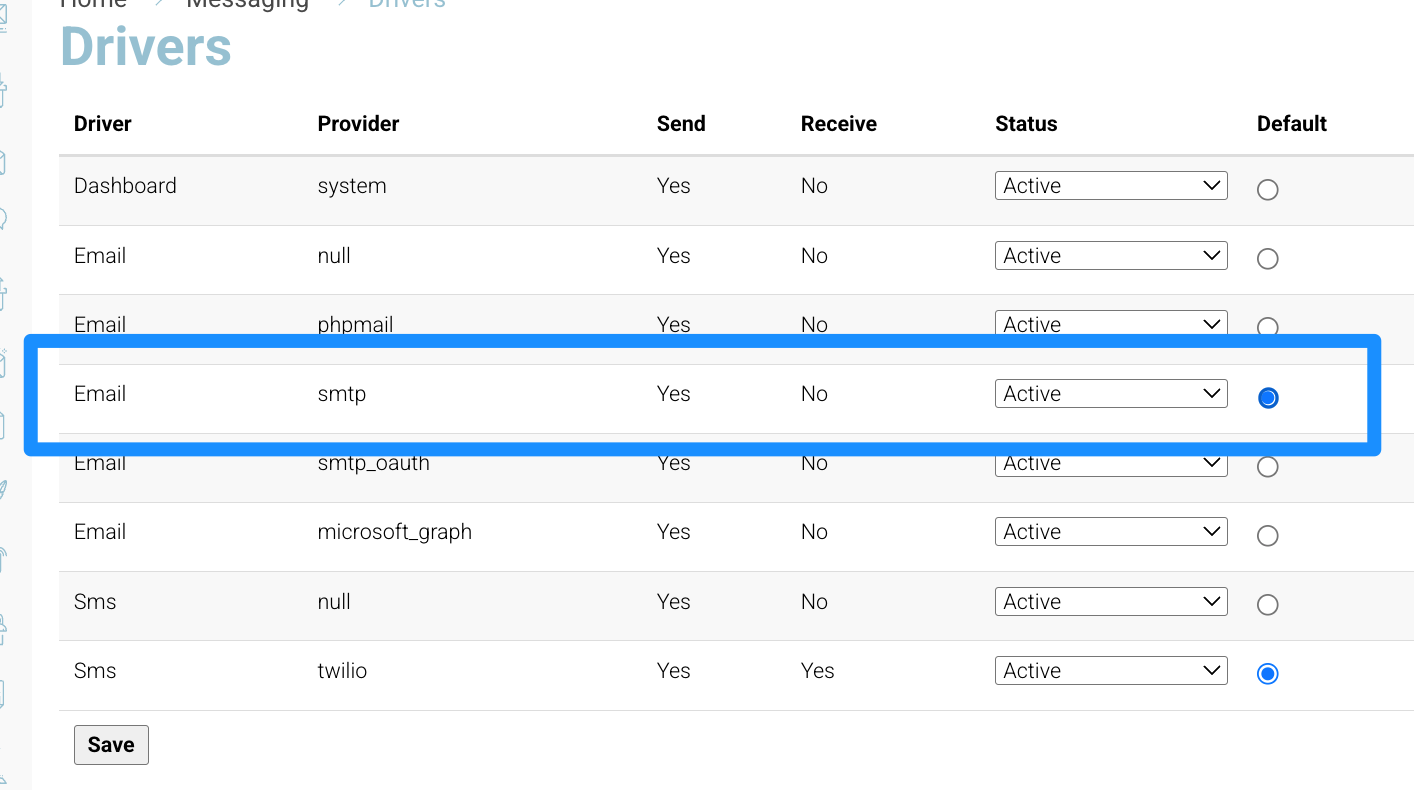
Double check mail sending driver is enabled
While still in messaging, naviagate to the middle bar icons - Select drivers (cloud icon)
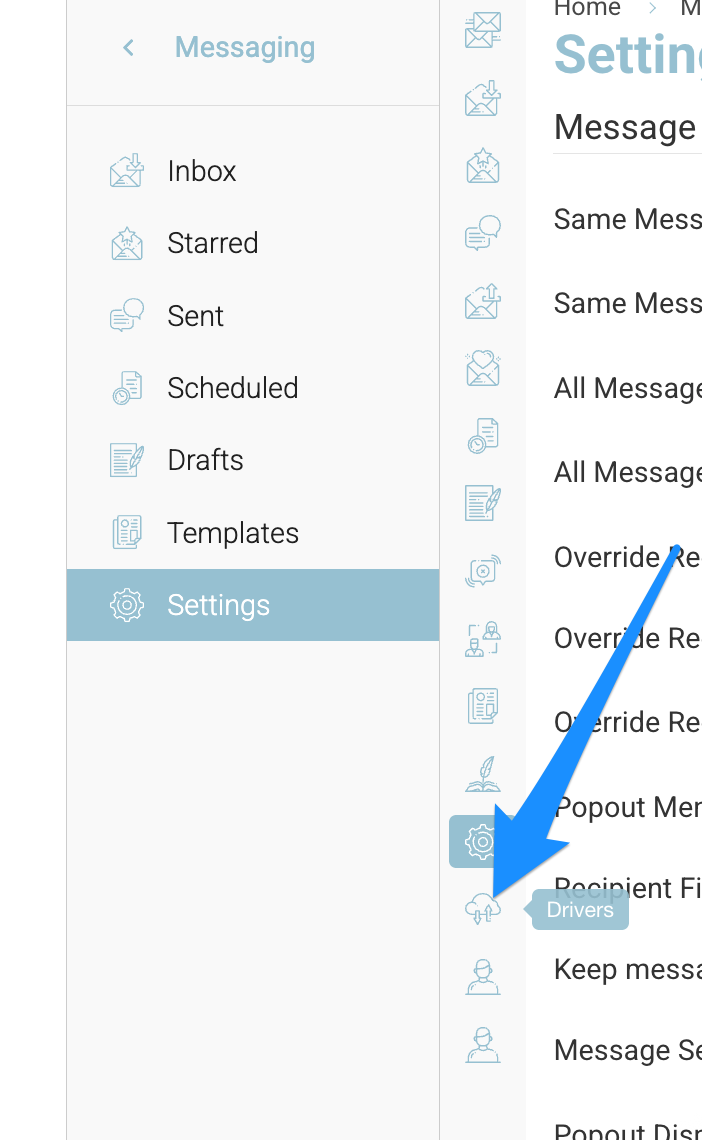
In drivers menu, ensure ‘EMAIL - smtp’ is ON
-
Last check - send a test email to yourself
Using quick messaging - create email and add your email as recipient.
If you received it, congratulations, everything is in working order!
If you have not received your test email, go to the messaging main menu and see if there is an error in your test email. You will find this by selecting the email, scroll to the end of the screen and viewing ‘status’
If email is failing, double check the above steps and your credentials entered to ensure they saved okay.
Please contact us if you need assistance - support@courseco.co