Website Payment Types
How to add payment options to a schedule
Navigate to the website.
Make sure to be logged in as an administrator.
3. Navigate to Courses > Schedules.
The Schedules page will be displayed.

4. Click the Schedule for which you want to enable the sales quote option.
The Summary tab will be displayed.
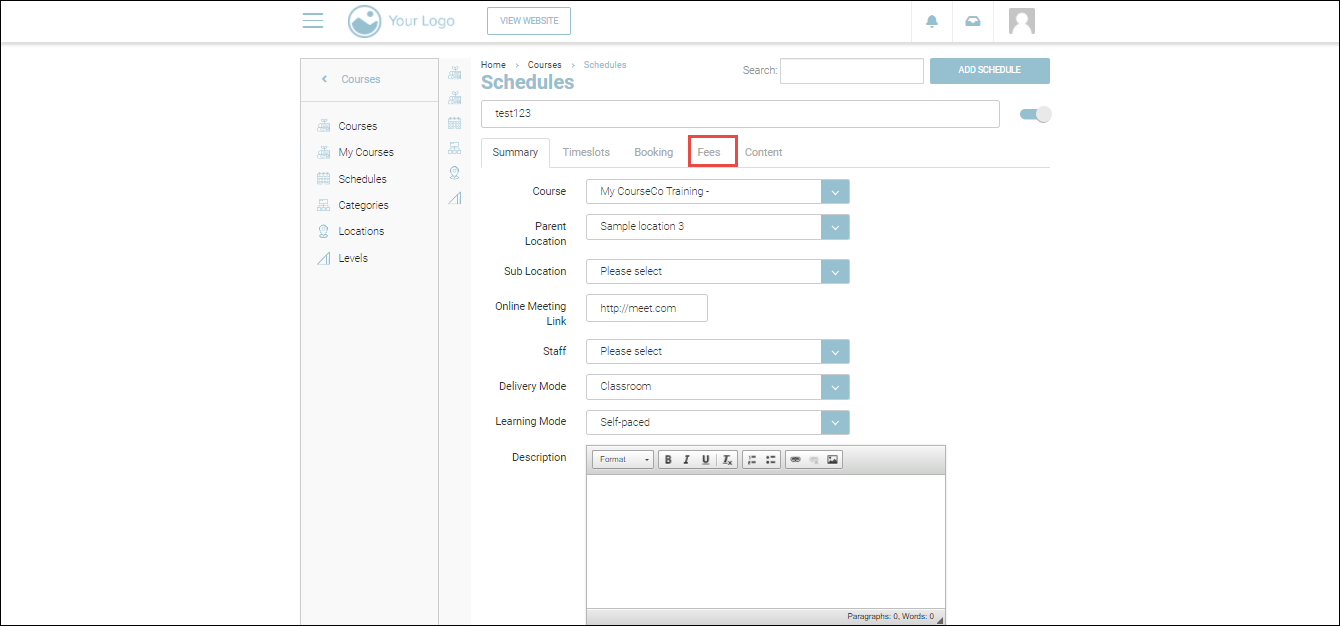
5. Click the Fees tab.
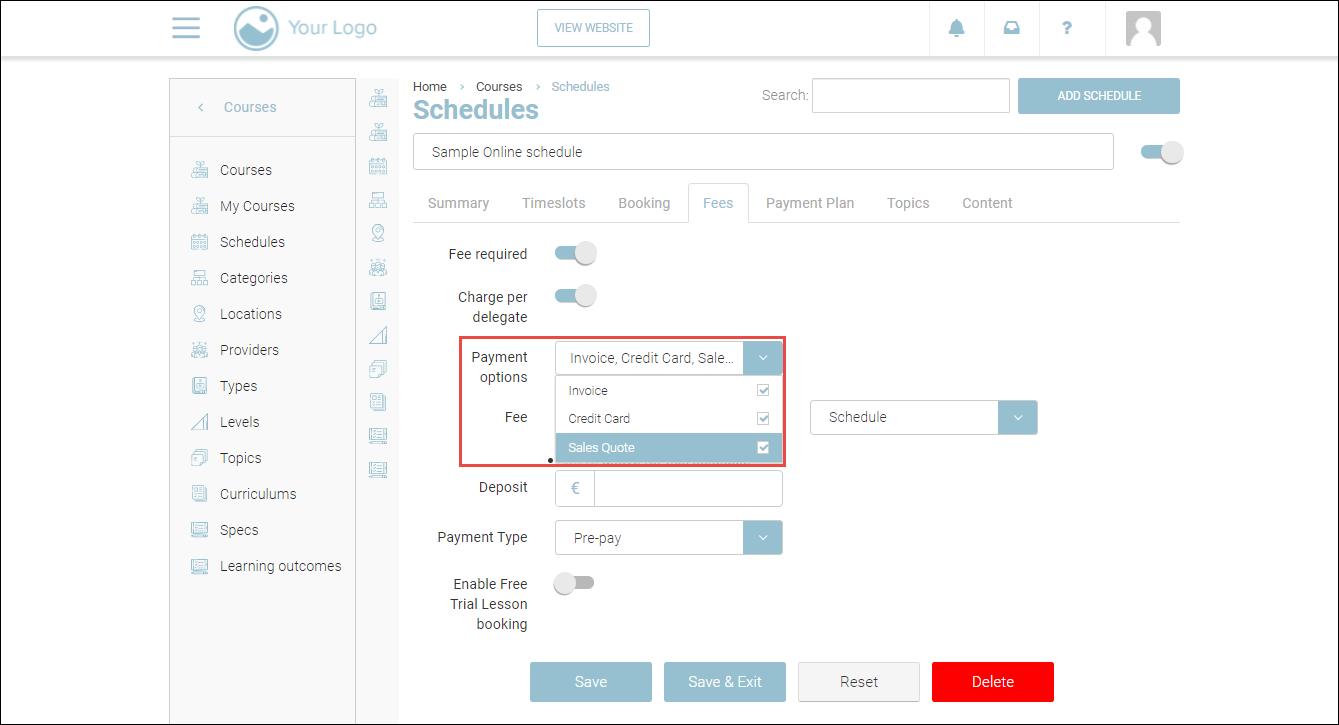
6. In the Payment Options dropdown list, check the Sales Quote option.
7. Click Save or Save & Exit.
Outcome:
The sales quote or invoice will be created.
To enable the sales quote option for a schedule, refer to https://ideabubble.atlassian.net/wiki/spaces/TP/pages/2262335580/Sales+Quotes#Apply-Sales-Quote-Option-on-specific-schedules.
Credit Card Payments - by Individuals & Org Reps
1. Sign up as an individual or an Org rep.
2. Login using your credentials.
3. Find the course for which you want to enroll.
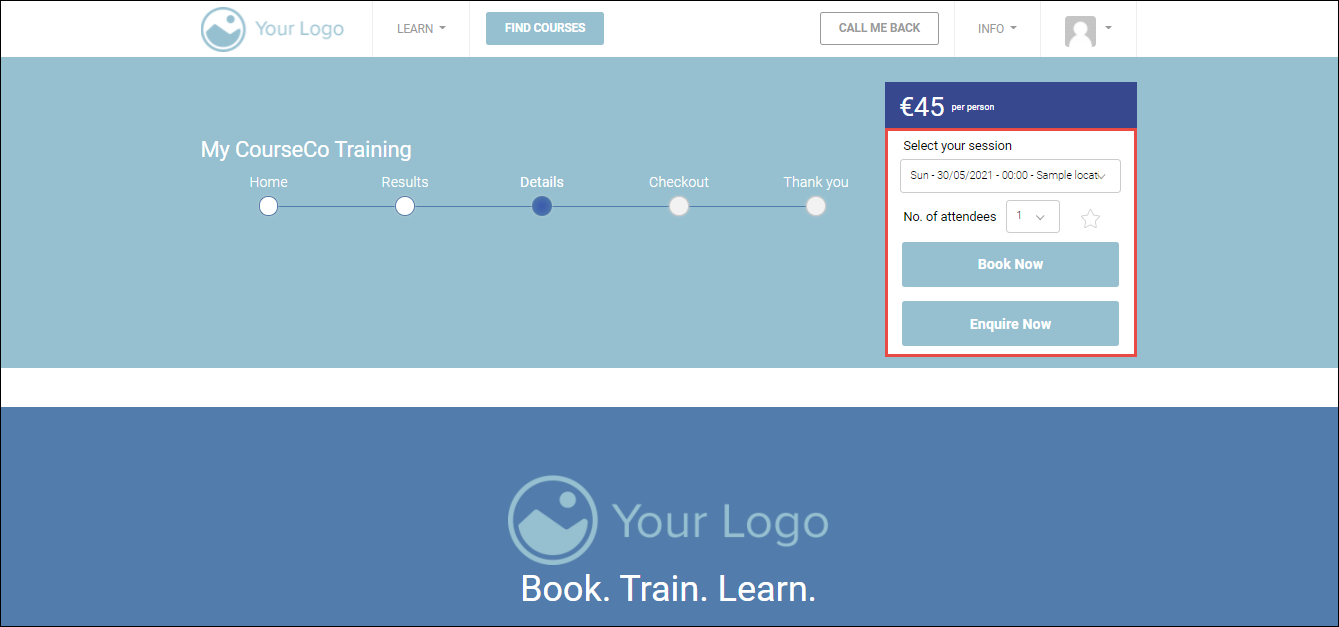
4. Select the session and the number of attendees from Select your session and No of attendees dropdown lists.
5. Click Book Now.
You will be redirected to Your Cart page.
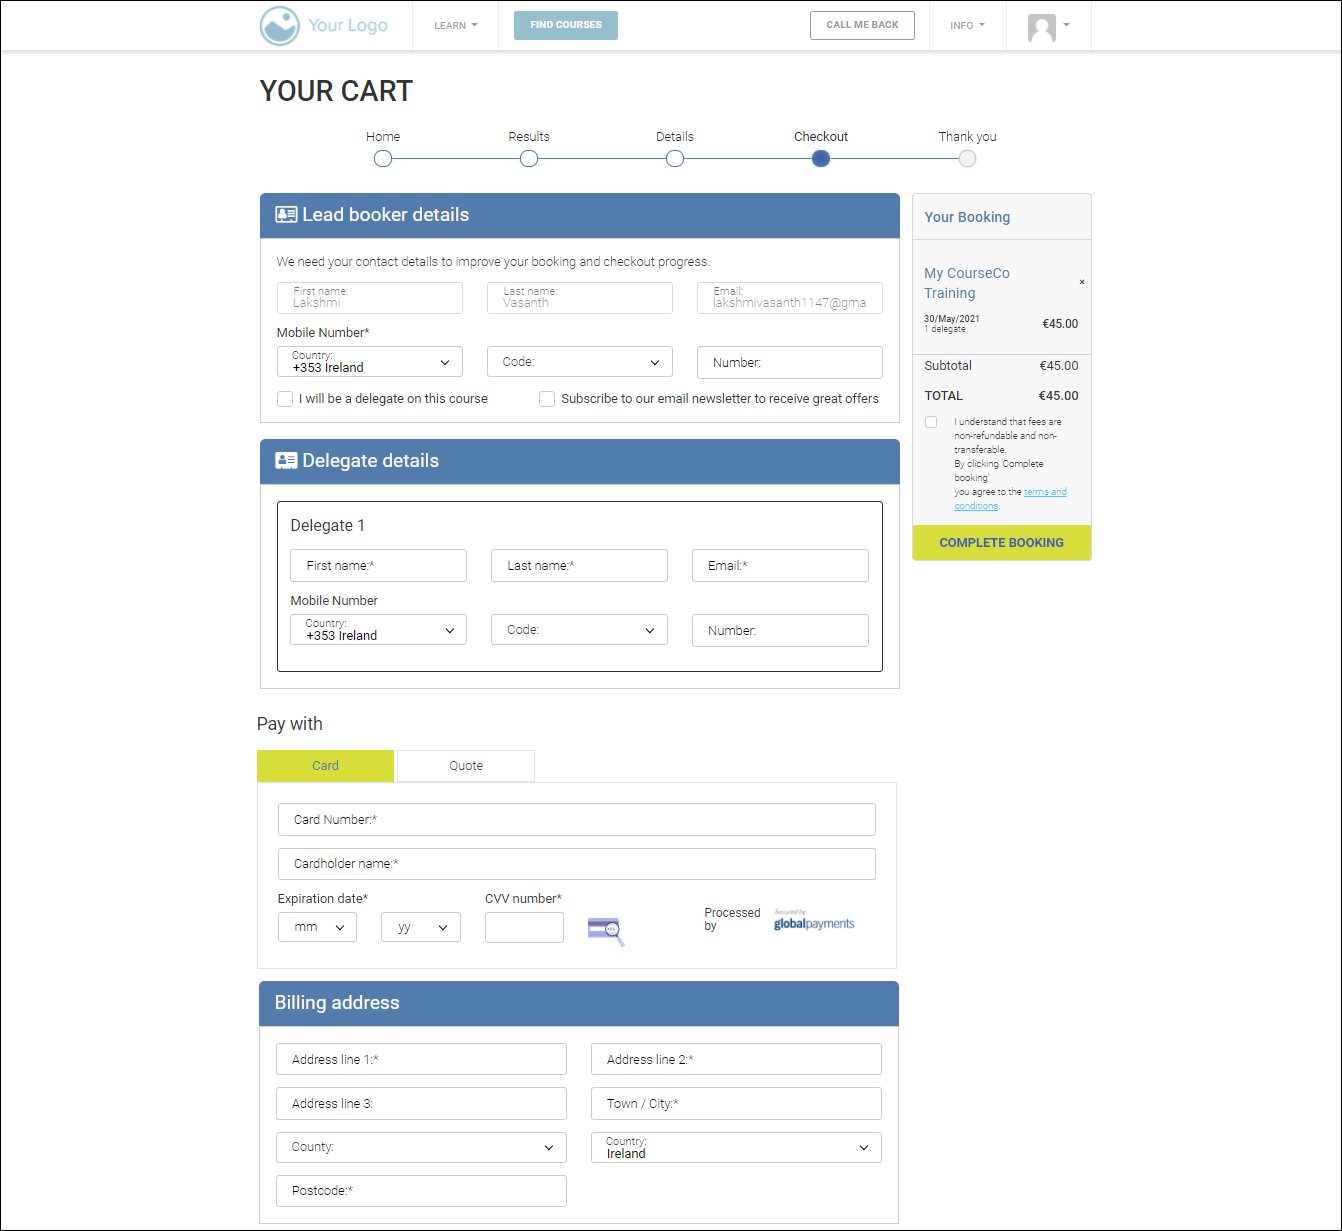
6. In the Delegate details section, enter the first name, last name, email, and mobile number in the appropriate fields.
Ensure not to enter duplicate email addresses.
7. In the Pay with section, click the Card tab.
8. Enter the credit card details and click COMPLETE BOOKING.
The booking will be confirmed. A paid transaction will be processed on CourseCo. Your payment gateway will receive your payment and transfer your linked bank account. A confirmation email will be sent to the lead booker. Booking details will also be sent to delegates that have been booked on to the course.
Purchase Order Payments - by Org reps
1. Sign up as an individual or an Org rep.
2. Login using your credentials.
3. Find the course for which you want to enroll.

4. Select the session and the number of attendees from Select your session and No of attendees dropdown lists.
5. Click Book Now.
You will be redirected to Your Cart page.
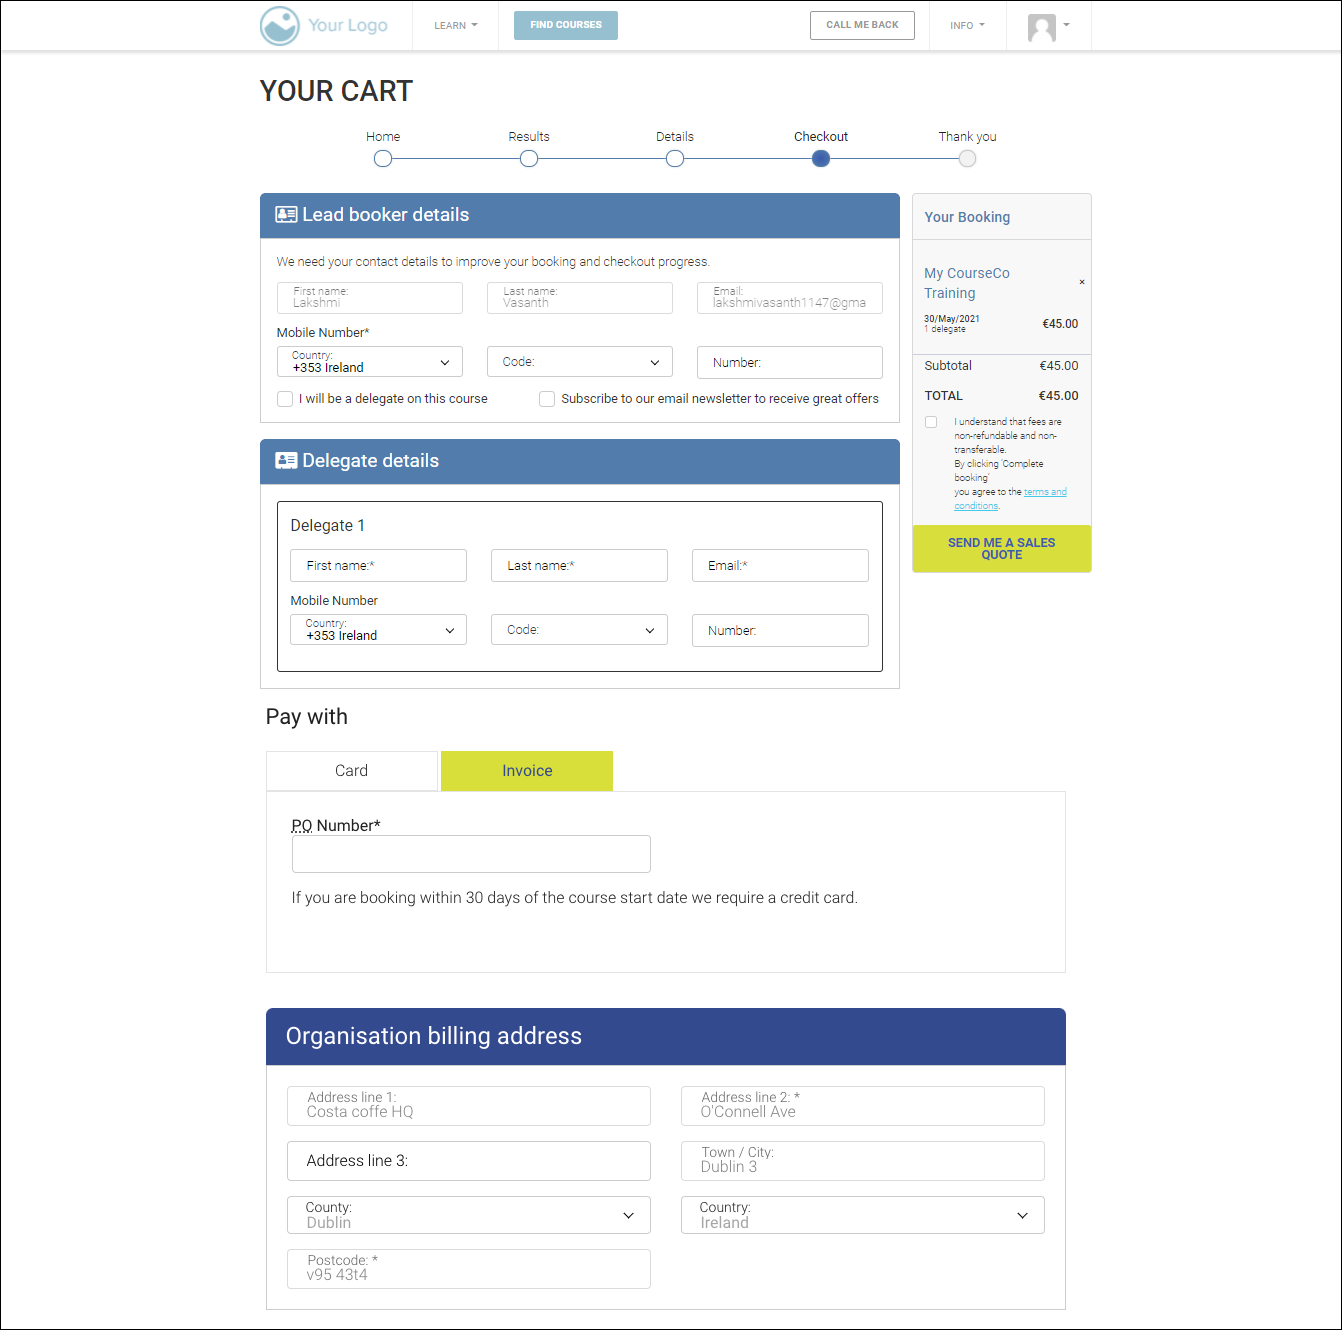
6. In the Delegate details section, enter the first name, last name, email, and mobile number in the appropriate fields.
Ensure not to enter duplicate email addresses
7. In the Pay with section, click the Invoice tab.
8. Enter the PO number.
9. Enter the billing address and click COMPLETE BOOKING.
Booking will be confirmed and the PO number will be applied to the booking. An outstanding transaction will be created on CourseCo. A confirmation email will be sent to the lead booker. Booking details will also be sent to delegates that have been booked on to the course.
Outcomes:
Booking will be confirmed.
PO number will be applied to the booking.
An outstanding transaction will be created.
Delegates and lead booker will be emailed.
