Transfer a delegate to a new Schedule
With CourseCo’s Transfer features, you can now transfer delegates or a whole booking (i.e. all the delegates) to a new schedule. To transfer a booking, please follow the steps given below:
Feature available on Prime package and is an Add On Feature. Please contact your CRM lead for information
Log In as an admin
Click on the Bookings Plugin, in the left menu
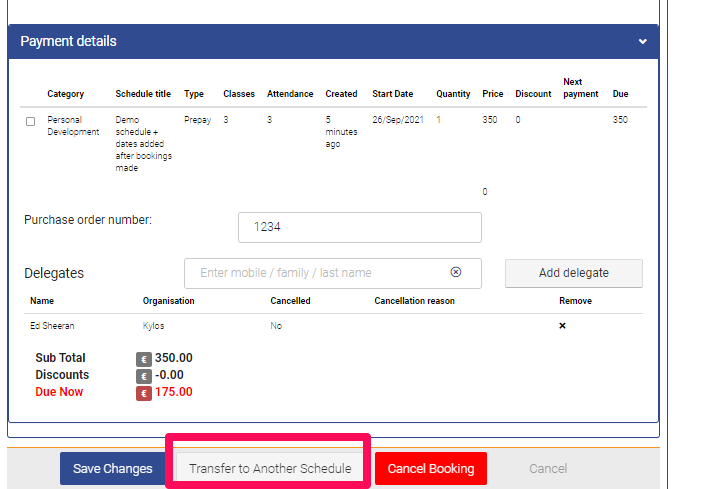
Search and Select the booking that you want to make a transfer on.
Click on the ‘Transfer to another schedule’ button in Edit booking section
Please contact Support if you would like this option enabled (it is a small add on fee if you are not on the prime package)
Transferring where there is multiple schedules is the one booking is not supported
You can Transfer upcoming bookings only. Past bookings can’t be transferred.
You will be redirected to the Transfer Booking page
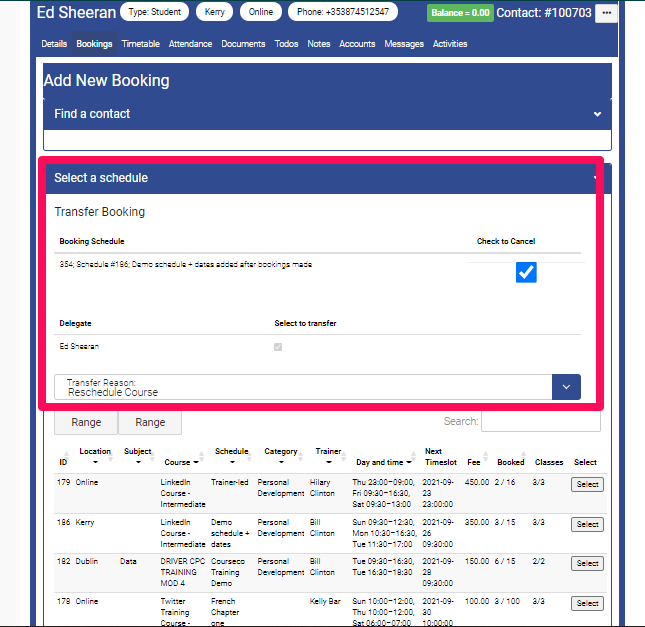
Please select the names of the delegates you want to Transfer
Select the reason for Transferring eg Delegate Cancelled.
Search and select the new schedule
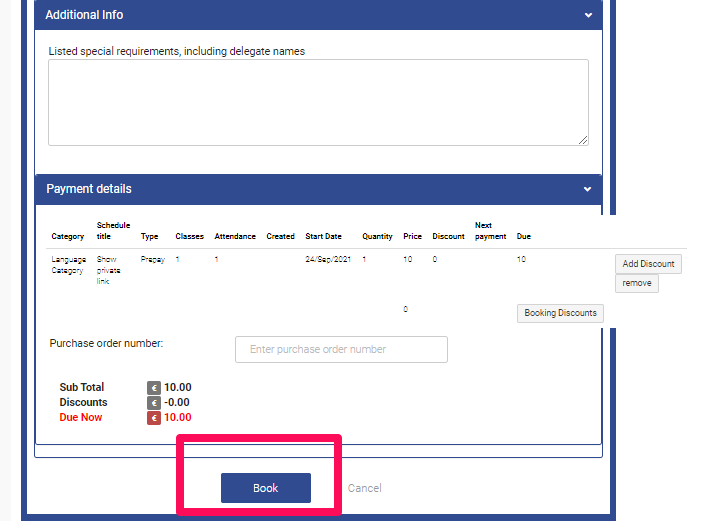
Review Payment Details for the Transferred Course
Click on Book
If Applicable, Add the discounts to the new schedule if applicable
Outcomes
The new Booking will be created
The selected delegate will be cancelled from the original booking
The delegate(s) will be moved from the old booking to the new booking
If the previous booking had an outstanding, the outstanding transaction will be cancelled and a new transaction created
IF the previous booking was paid or partially paid, a credit will be added to the contacts file. Follow the steps below ‘Transfer a paid booking to a new schedule’ to make payment with the credit
We do not support transferring ‘delegate allocation/ghost bookings’ only named delegates can be transferred. See delegate allocation to learn more on this feature - Click here
How to Transfer a paid booking to a new schedule
You may have previously received payment for the original booking via credit card, eft or cash. By transferring the paid booking to a new schedule, you are adding a credit to the contact's account. You would like to update the new booking with the correct amount outstanding.
Login as Admin
You have completed your Transfer booking
Now, You need to update your accounts
Navigate to the contacts accounts tab
Review the transactions
You will see a cancelled transaction > for the original booking
You will see a credit available transaction > for the amount paid on the original booking
You will see a new outstanding transaction > for the new booking
You need to select the Credit available transaction, once you’ve done this:
Select the Action button (corner right), select Journal - Cancel Transaction from the dropdown
On the popup, add a note for reference e.g. Updating transferred booking id 1001 with this credit
Save
Next, select the outstanding transaction for the new booking
Select the Action button (corner right), select Make a Payment
Select type = Cash (this is a workaround for the moment)
Enter the amount you want to pay off i.e. the amount of credit you cancelled in point 5
Add a note for reference.
Save
Outcome
The amount paid is updated
Your contacts accounts are displaying the correct amount outstanding.