ToDos | Create Online Exam Scheduled Exam
Creating an Online scheduled Exam Exam
To create an exam, please follow the steps given below:
Navigate to Todos > All Todos.
Click New todo and then select Exam.
Enter or select the required field values in the respective fields. There are four tabs namely
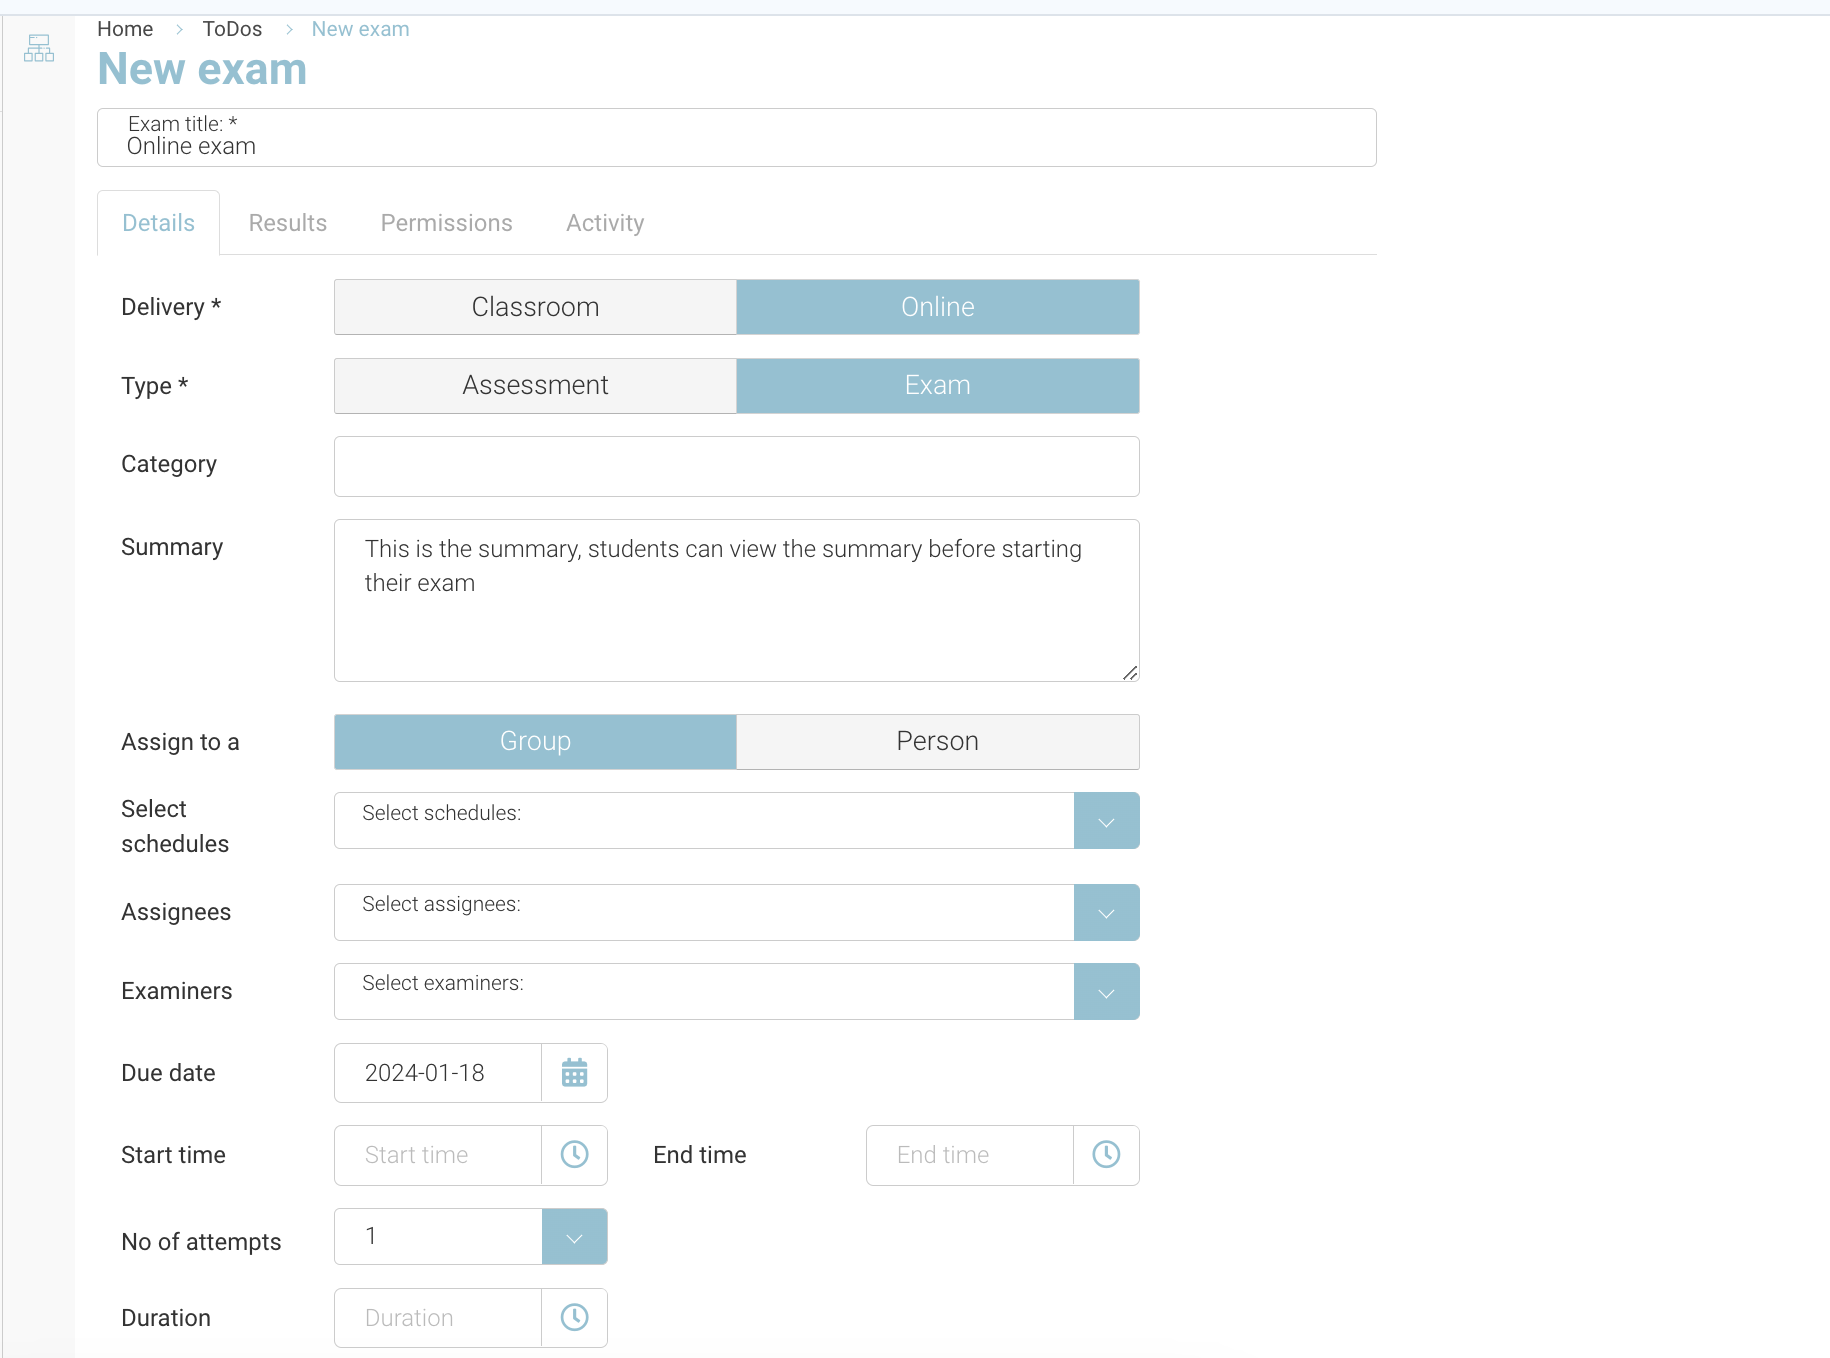
Details Tab: For field/section description, refer to the table below:
Field/Section | Description |
|---|---|
Delivery | It is the location where the exam is held. The available options are Classroom and Online. Online will be selected in most cases |
Location | Select the location where the exam is held from the Location dropdown list. Applicable for Classroom exam only |
Type | Select the type of the exam > Exam, the other option is assessment |
Category | Enter the category of the exam - help organisation your exams eg Summer/Winter |
Summary | Enter the summary of the exam - this will display in the student portal |
Assign to a | Select to whom you want to assign the exam. The available options are Group i.e. schedule |
Select schedules | IF Group selected > Select the schedule(s) of the exam from the Select schedule dropdown list. |
Examiners | Select the examiners to examine the answer sheets from the Examiners dropdown list > Applicable for text based question exams only |
Due date | Select the due date of the exam from the calendar dropdown. |
Start time / End time | Start time of the exam, and end when the student can’t access any longer. |
No of attempts | Select the number of attempts to get through the exam - typically used for MCQ Exams |
Duration | Select the duration of the exam to complete filling the answer sheets i.e. the timer displayed to the student |
Questionnaire | Search and select the questionnaire. This was previously created in the questionnaires plugin |
Enable cheat detection | Fraud detection enabled on/off |
Results Tab: Enter or select the required field values in the respective fields. For field/section description, refer to the table below:
Field/Section | Description |
|---|---|
Grading schema | Select the grading schema from the respective dropdown list. |
Grading | Select the mode of grading the exam results. The available options are Automatic and Manual. |
Results published | Select the Date and Time to publish the results in the respective fields. |
Permissions Tab: Select the people who want to share the exam.
Activity tab: No data.
Click Save.
Outcome: A new exam will be created.
Scheduling Exam results Publish Date
To schedule exam results to display in the student portal, please follow the steps given below:
Navigate to Todos > All todos.
The All todos page will be displayed.
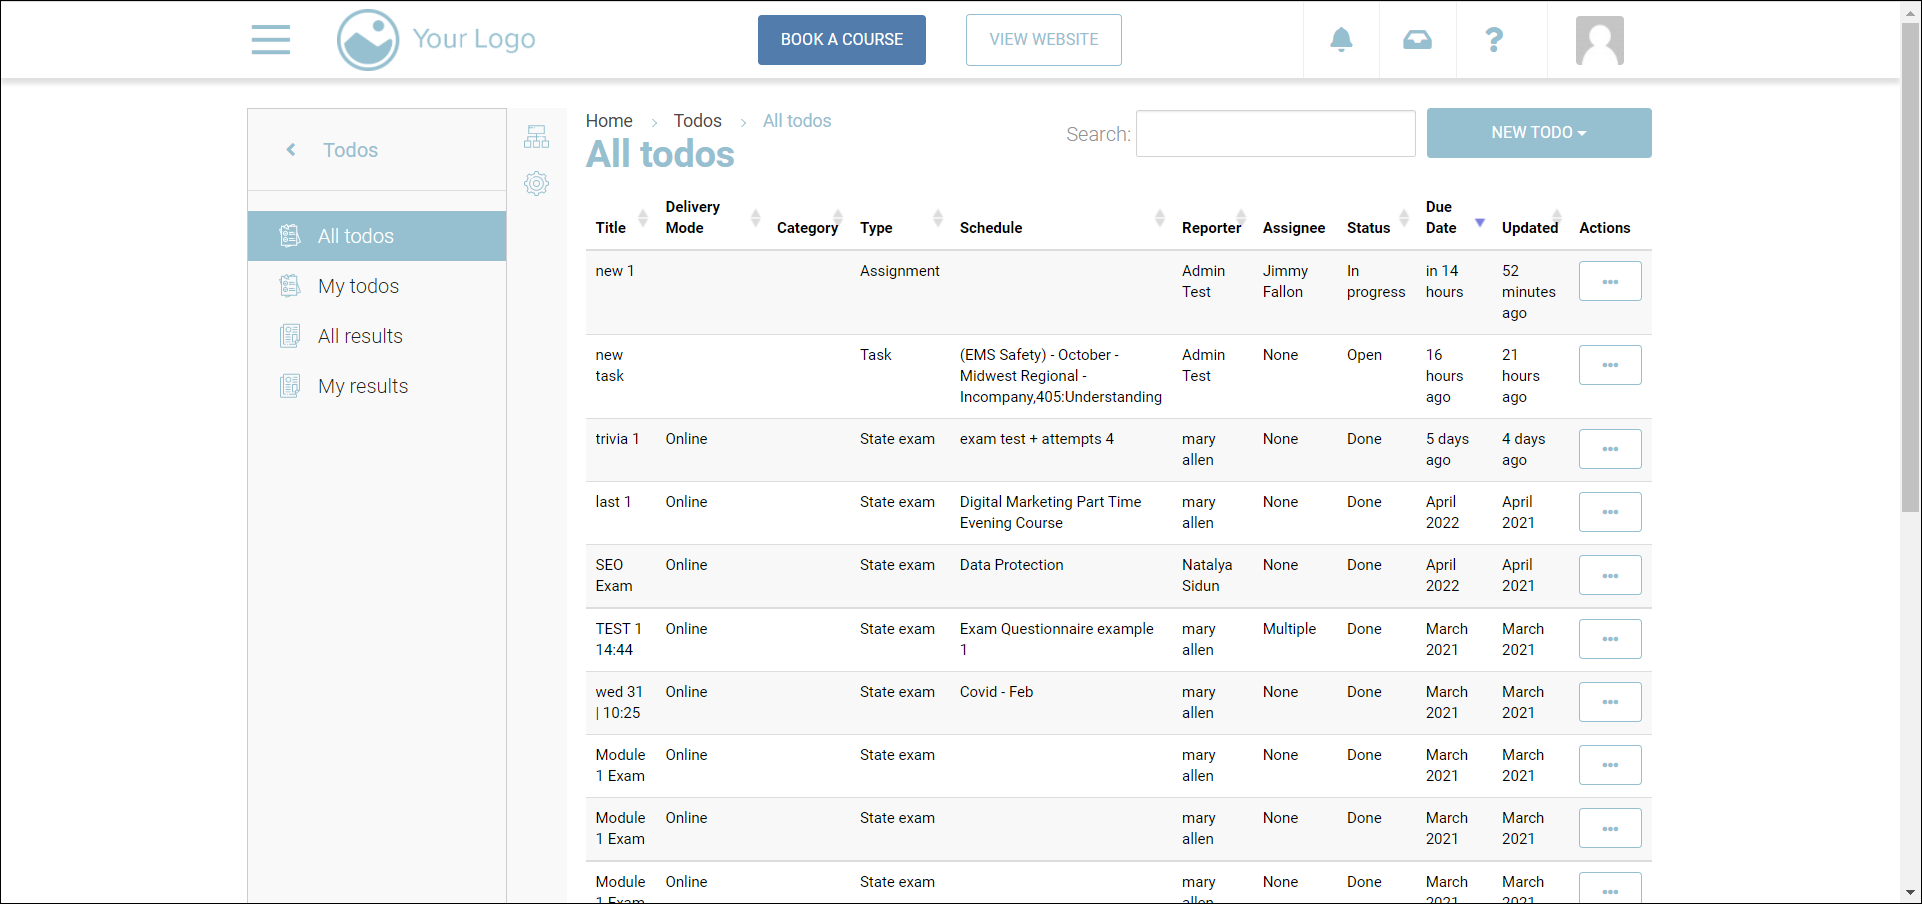
Select the exam for which you want to schedule results for.
The exam in editing mode will be displayed.
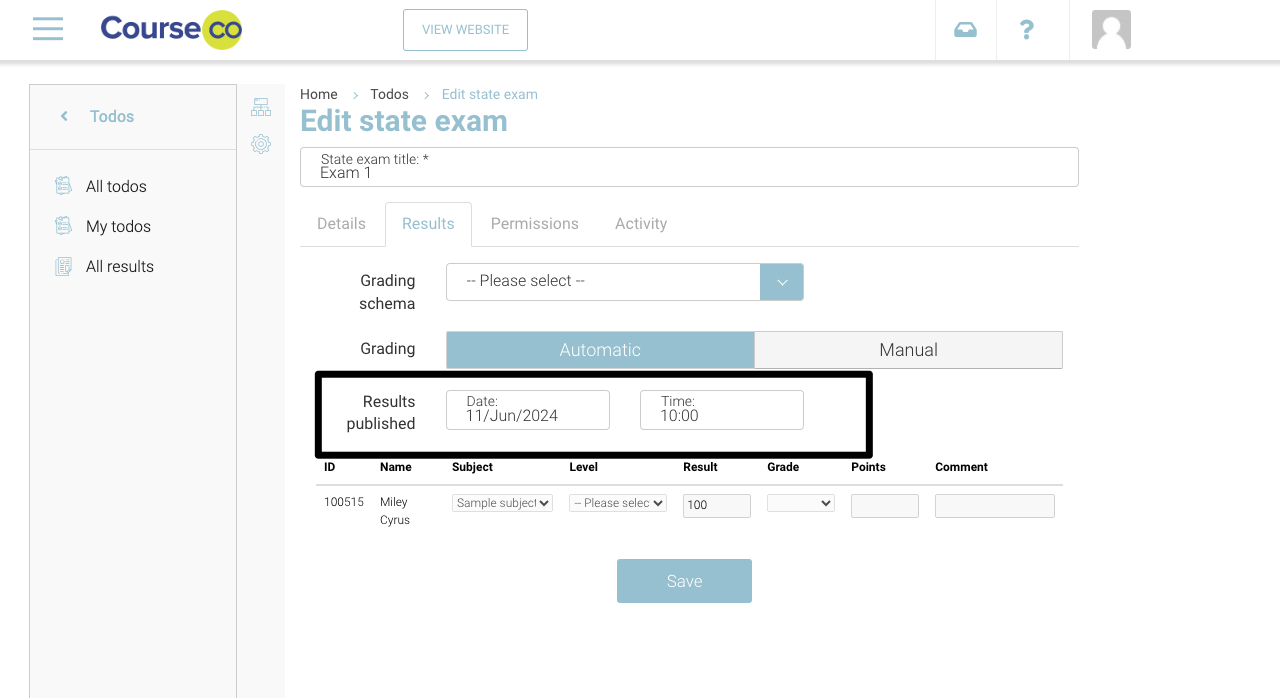
Click the Results tab
Bypass/Ignore the Grading schema of the exam.
Bypass/Ignore the mode of grading whether it should be Automatic or Manual.
Within Results Published, Select the Date and Time on which the results should be published in the respective fields.
Click Save.
Outcome: The results will be shared to the portal on the specified date and time to the student.