Online scheduled exams are like ‘Classroom’ exams with a start date, start & end time and a specified length of time to complete the exam
In this guide, you can see how a student can access exams assigned to them and take their exam in their portal. Please follow the steps given below attempt an exam.
Student: How to view my assigned todos / exams
To view todos assigned to you, please follow the steps given below:
-
Log in with your student credentials on the website
-
Click on your profile on top right of the screen
-
Select ‘My account’ from the dropdown
-
Select ‘Todos’ from the left menu on the screen
-
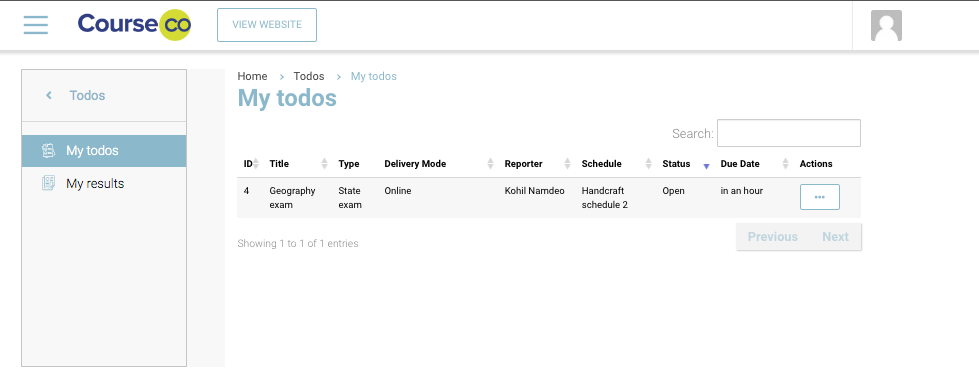
You will be presented with your Todos as shown in the image below:
-
You can select Actions> view to view the todo assigned to you
Summary of the exam is added by admin in the todo creation, summary input

Student: How to Start my Todo Exam ?
To start an exam as a student, please follow the steps given below:
-
Go to Todos> My Todos
-
In Action column, select ‘View’ button to view the exam
-
Select ‘Start’ button in Todos details page
-
Please see image below for your reference
The position of the start button can be after the student selects View on the Todo or it can be added to the list screen of todos. Let us know if you have a preference.
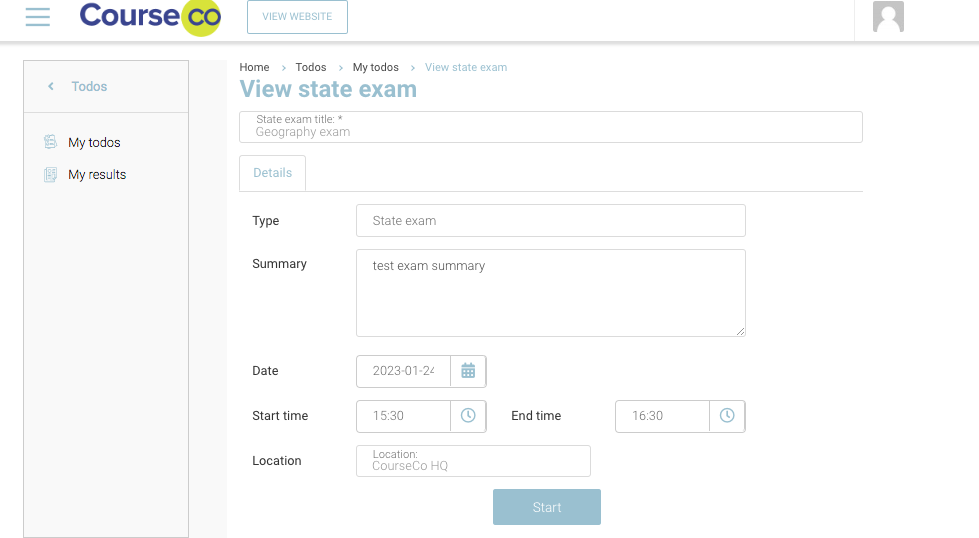
START button only appears when the access date and time is open. Start will not appear before or after the configured time.
Student: How to answer my Todo Exam?
To answer questions in Todo Exam, please read the steps below:
-
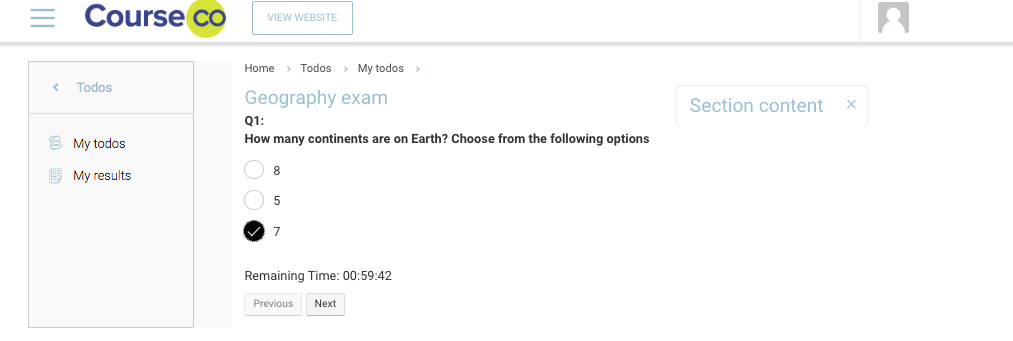
Multiple choice question: you can select one of the options available to choose in a question. Please see image below for reference:
-
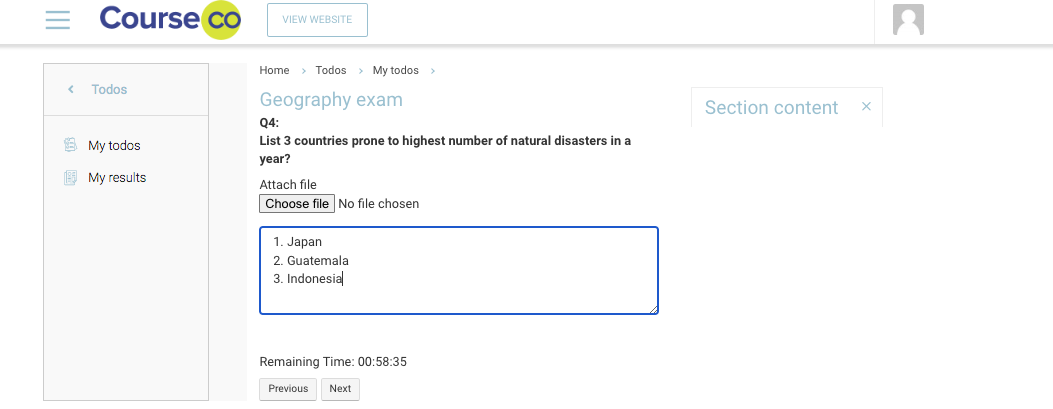
Text area answer: Question will have a textarea attached where you can type in your answers as shown in the image below:
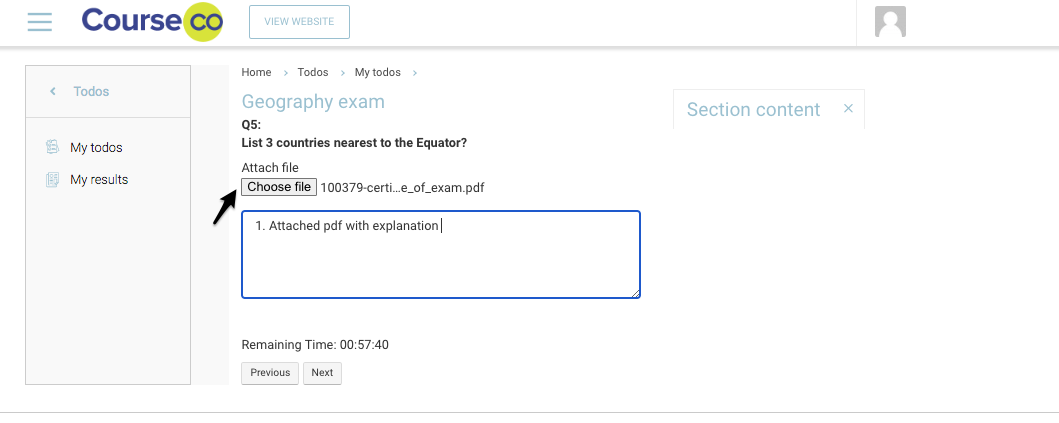
Student: How to attach an answer file in an Exam?
To attach a essay or reference file to an answer, please follow the steps below:
-
Go to the question in Todos
-
Above the text area, there is an ‘Attach file’ button
-
Click on Attach file button
-
Select the file from your local machine
-
Click on Attach button
-
The file will be attached to the answer as shown in the image below
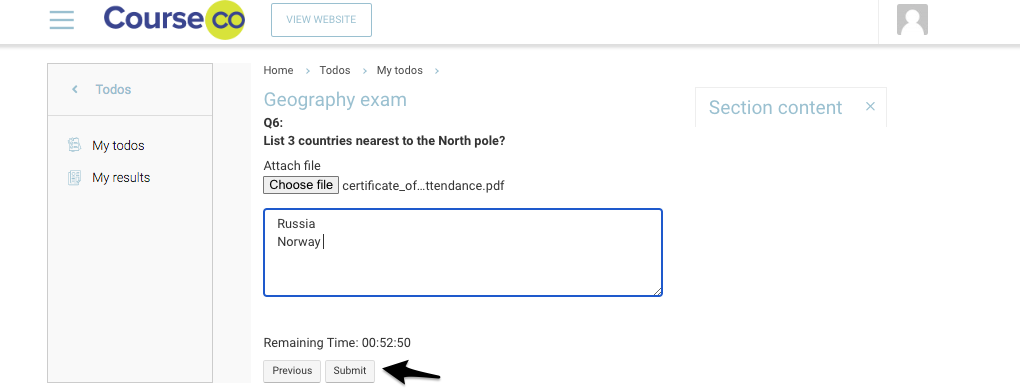
Student: How to Submit an exam after completing?
To submit the exam once you have completed all answers, you can simply click the ‘Submit’ button.
Please make sure you have finished answering all the questions in the exam before submitting
You can also use ‘Next’ button to answer next question.
You can use ‘Previous’ button to review your last answer.
-
When you have completed reviewing, please click ‘Submit’ button to submit the exams
Outcome:
-
Student has submitted the exam with status Submitted and examiner status Awaiting
-
IF and examiner was assigned during the todo setup, he will not see the exam and transcript in his portal.
-
Admin and assigned examiner can view the full transcript (completed exam)
-
Student can see the status of the exam also
-
Depending on your setup, students will have access to the corrected exam when you have specified
-