IPAF Bookings | Managing IPAF bookings and mentioning the exam(s) the attendee is completing on the training.
If you are a training company who trains multiple exams in 1 schedule, each attendee might be doing a different and even multiple exams in the 1 day. With the below simple solution, it will assist with managing these exams.
Below are suggested steps and maybe altered to suit your business.
Overall steps on creating an IPAF type Booking
Pre-condition - you have reviewed the below steps
Create the booking as normal
Do not enter the PO when booking as we don’t want the booking confirmation email to send straight away
While still on the booking (edit screen) - select the schedule id (left corner of the page) - the schedule id is hyperlinked. This means, when you select the schedule id, it will open the schedule edit screen on a new tab
While on the schedule, update the new attendee’s weight and labels
Jump back to the booking, enter the PO + save changes
Outcome: the booking confirmation email with the attendee names and emails will populate in the booking confirmation email to the booker.
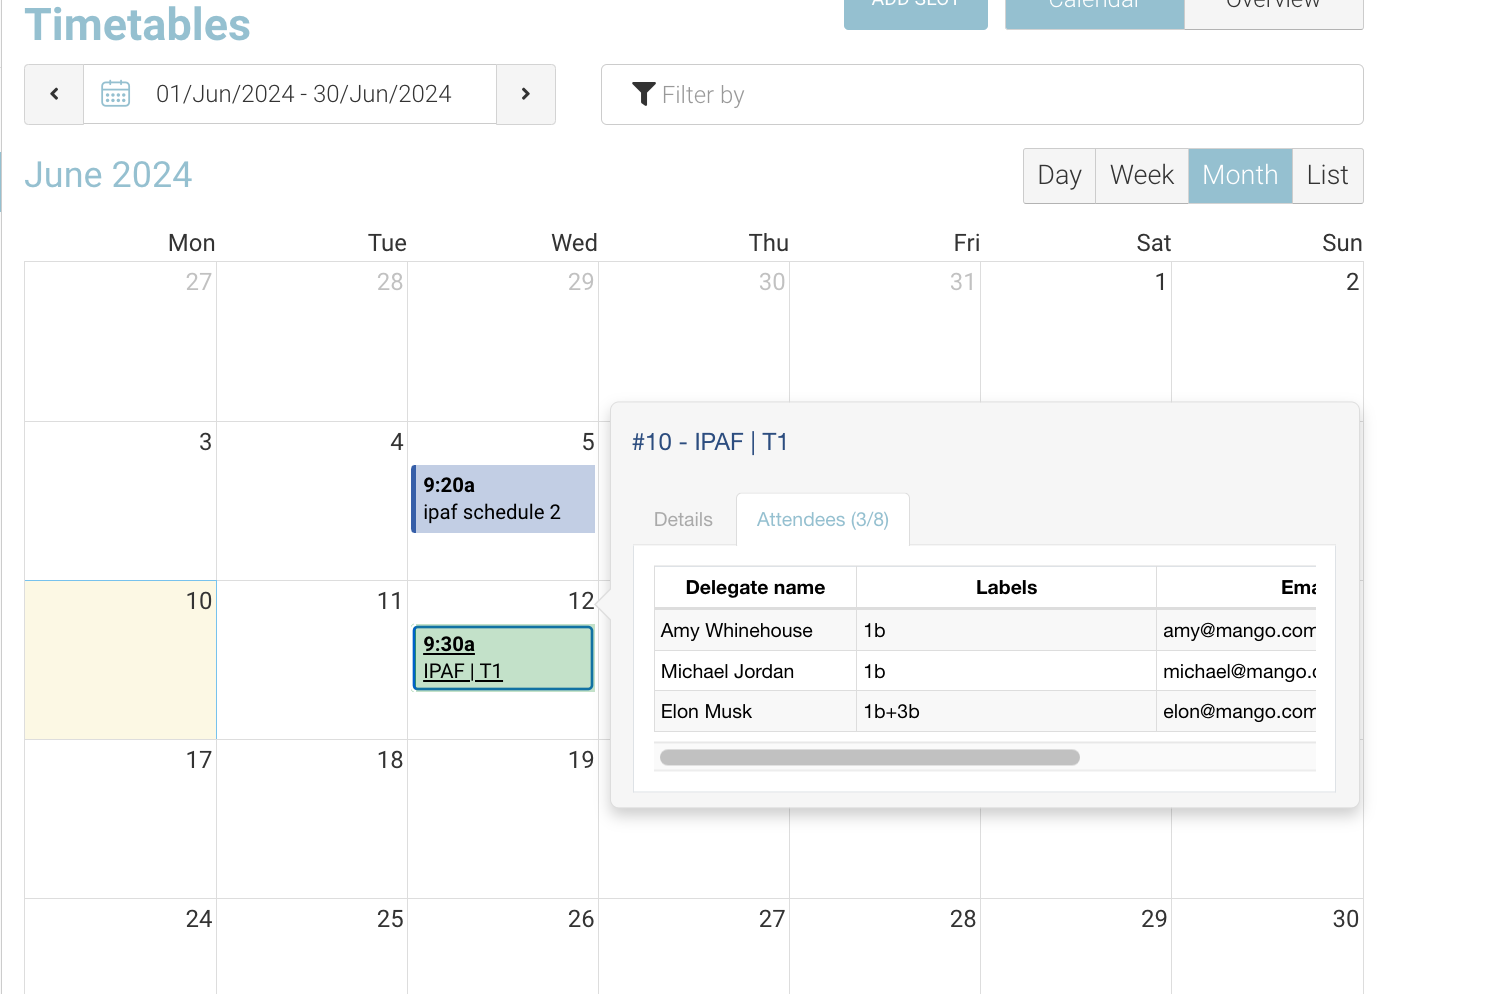
Timetable - your timetable > timeslot > attendee tab will populate the attendee names and select Labels.
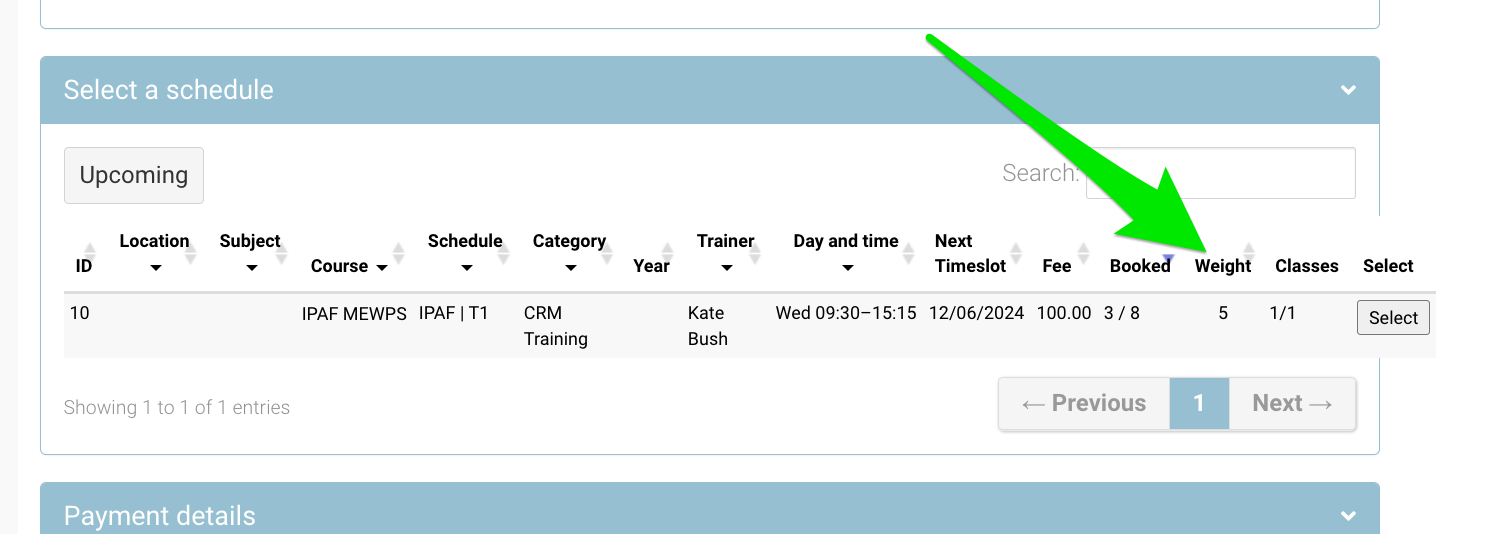
When creating future bookings, you will see the schedule ‘weight’ column calculate the ‘weight’ assigned to the schedule. This will help you determine if the schedule has space for more attendees and their IPAF exams
How to assign an IPAF exam label to an attendee on a schedule
Pre-condition: the attendee has been booked onto the applicable schedule
Login as Admin
Open the applicable schedule (the schedule where the attendee is booked)
While on the schedule, open the attendee tab
On the Label column, select the exam the student is completing on the training day + select Update button
Next, Update the weight of the exam via the Weight column eg this accounts for 2 i.e. 2 exams will be completed
Save
Outcome:
The attendee name has been updated with the weight of the exam and label has been assigned
The booking confirmation email can be triggered to the booker and it can populate the attendee name and the exam assigned to them (label)
The timetable will populate with the labels assigned to the delegate - Admin and Trainer

How to create a booking and view the ‘weight’ on the schedule
You are planning to create a new booking, but need to know how many exams are happening on the schedule. This will determine the schedule you will select at the booking stage.
Precondition - you have been updating the ‘weight’ of exams for the attendees on the schedules
Open Bookings
Create booking
Add your organisation / booker / delegate
Review the schedules
Pay close attention to the booked amount and ‘weight’ column
If there are bookings, but weight column is blank, no weight has been added, update your schedules first
Admin decides the schedule to select based on the weight
After the schedule is selected, the admin reviews the payment details section
Do not enter PO now
Book