As you already know, setting your courses up with the correct and smart categories/types is very important for the website guest navigating through your website. In this user guide I will explain how to create a category or type specific url so you can add buttons to your website (CourseCo or your own website). This means when a website user selects the link, they will be directed to the course-list page with the specific category pre-selected.
💡 CourseCo’s Product Owner Top Tips
-
Create a specific url for all your categories or course types
-
Embed these URLS in multiple areas from Buttons to menus, panels and Footers - website users work in lots of ways, so make it really easy for your clients to find what they need.
-
You could even place the URL in a automated email for marketing purposes!
See image below which describes visually what filtered.

How to create a Category specific URL
-
Firstly, you need an example url to build on
-
EXAMPLE URL - https://YOURWEBSITEURL.ie/course-list.html?category=x
-
-
Editing the URL - All you need to edit is
-
Open your CourseCo website front end
-
Edit the category id to match the specific category id - /course-list.html?category=1
-
Outcome: you have a URL that looks something like this https://Yourdomain/course-list.html?category=1
How to create a Type specific URL
-
Firstly, you need an example url to build on
-
EXAMPLE URL - https://YOURWEBSITEURL.ie/course-list.html?type=11
-
-
Editing the URL - All you need to edit is
-
Open your CourseCo website front end
-
Edit the category id to match the specific category id - /course-list.html?category=1
-
Outcome: you have a URL that looks something like this https://Yourdomain/course-list.html?type=11
How to find the category id or type to add to your URL
-
Login as an admin
-
Go to Courses
-
Open Categories or types, open a specific category
-
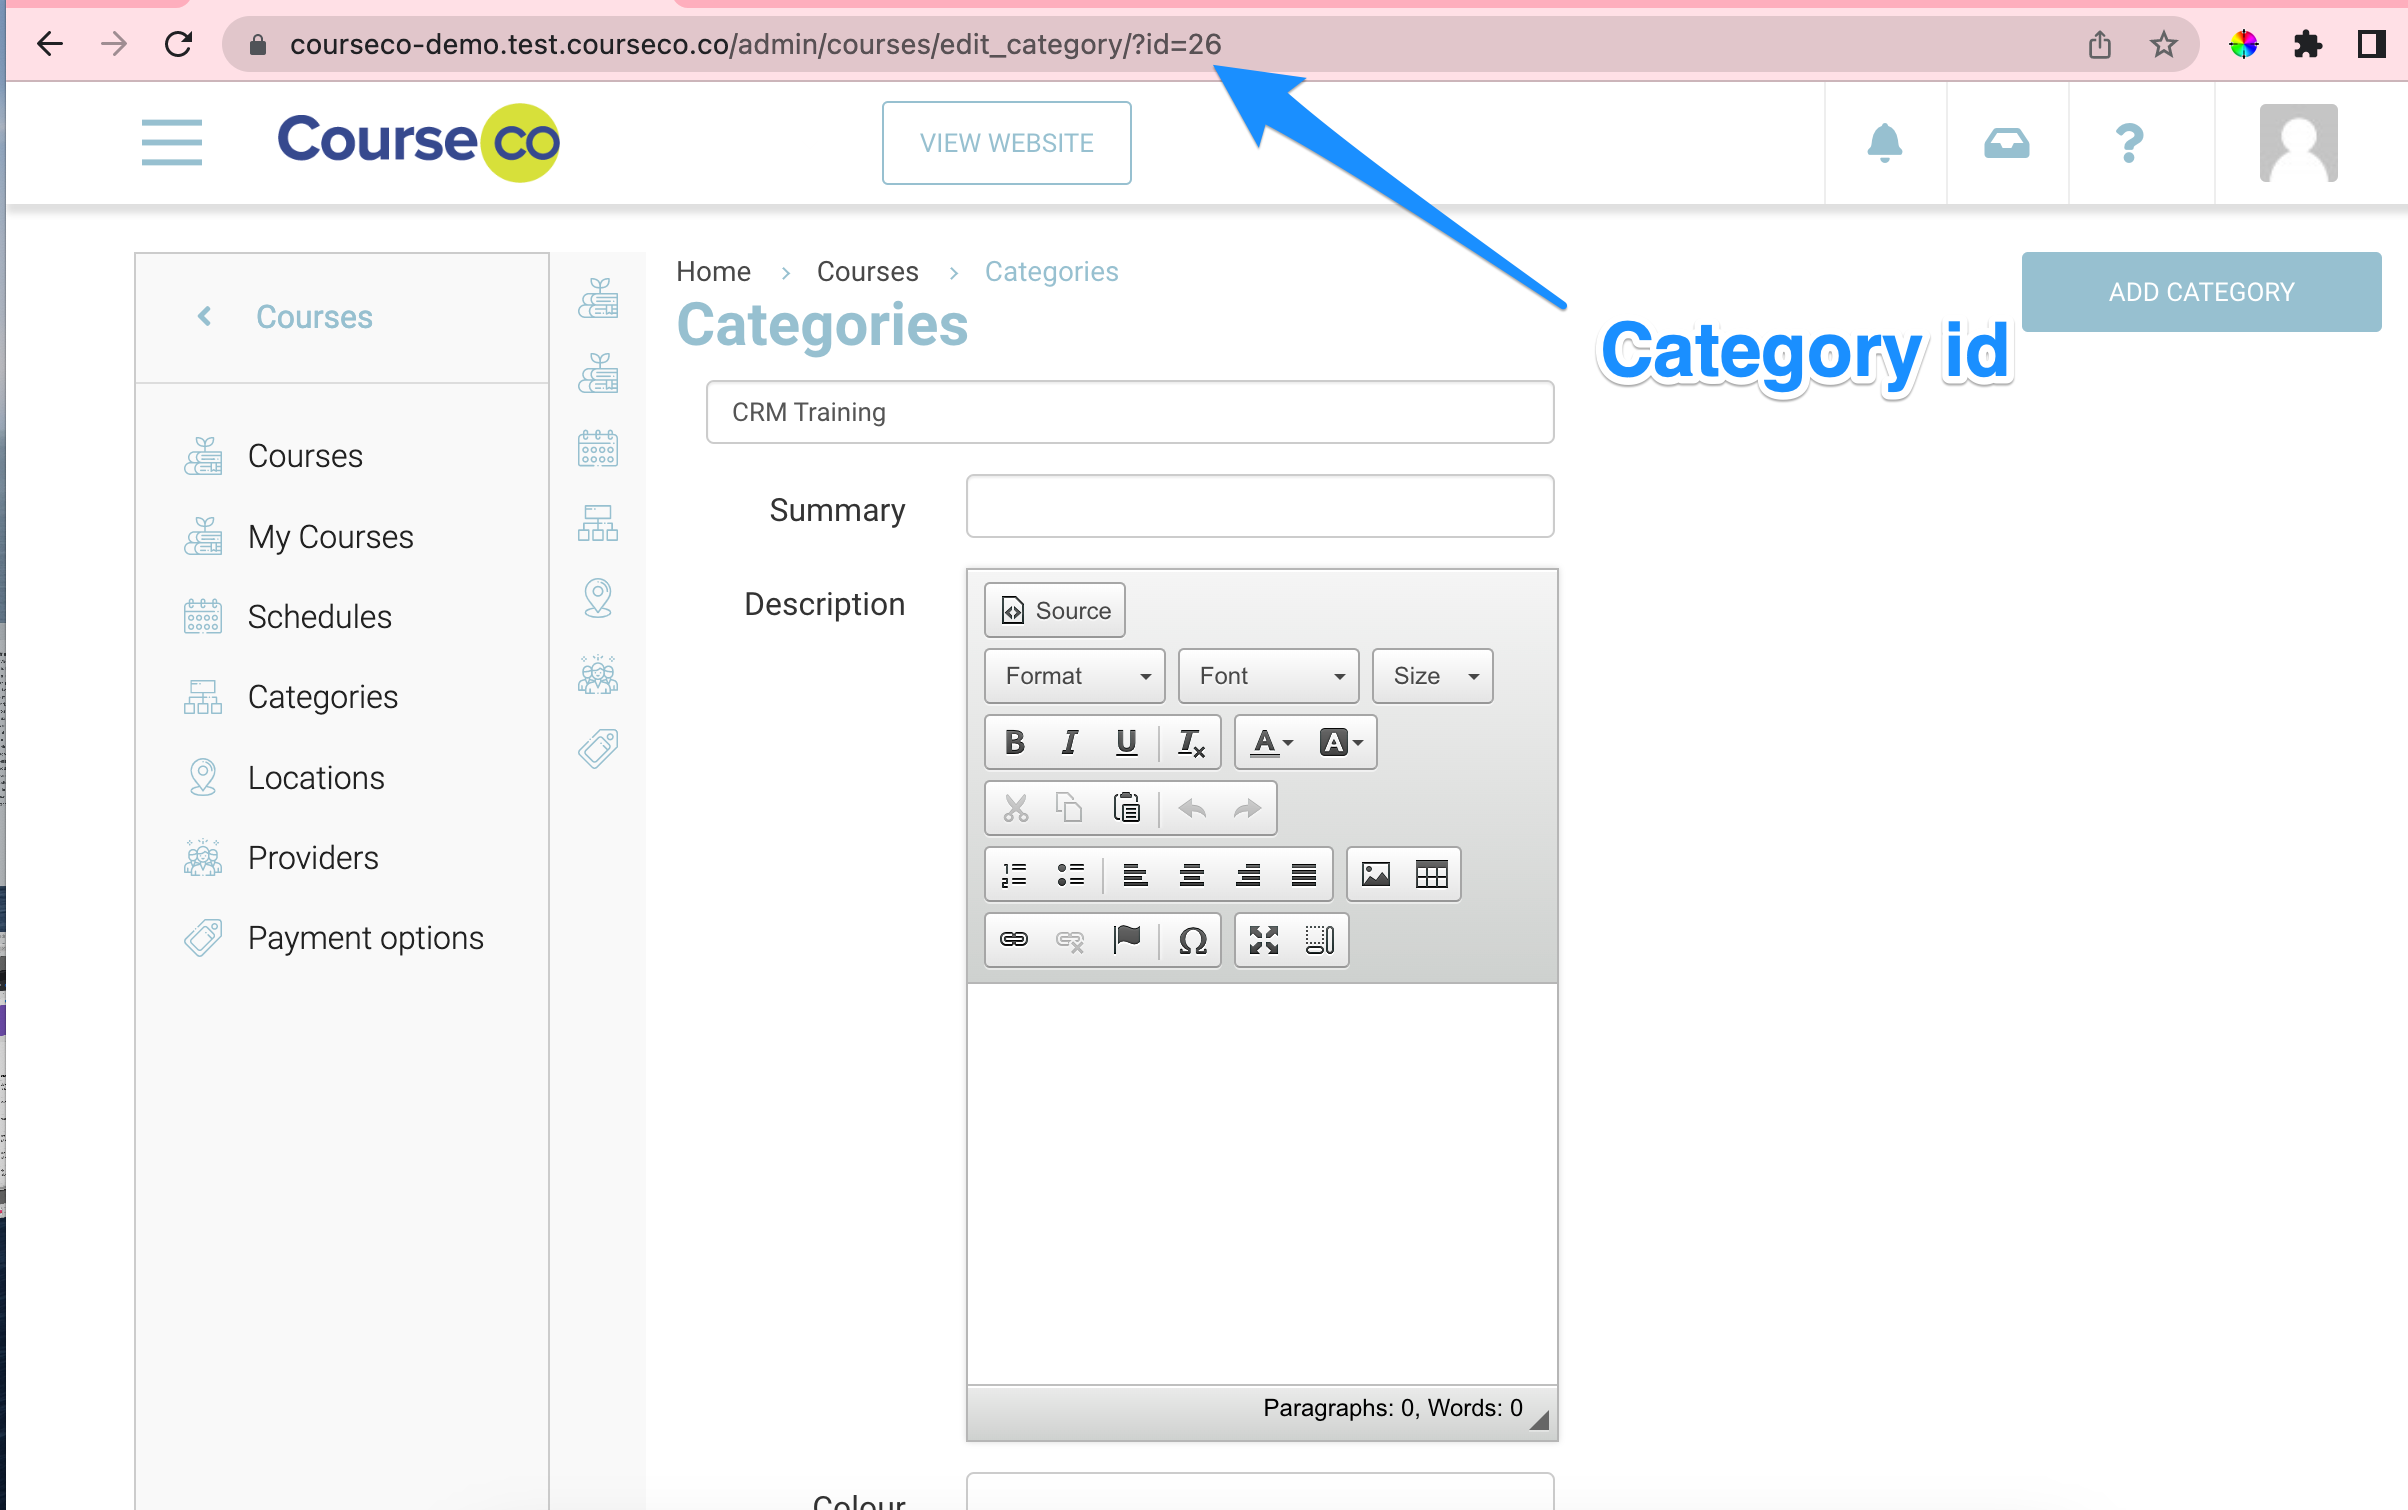
Review the URL at the top of the page - you should see the id in the title
-
example https://yourdomain/admin/courses/edit_category/?id=1
-
-
In the above example id 1 is the category.
-
Now add this id to your url