Contacts - Advanced Bulk Assign Label/Tag Management
Labels/Tags is available on CourseCo’s Prime Package. Please contact your CRM lead to learn more
With CourseCo’s label/tag feature, admins can create a tag and bulk assign them to contacts. In this guide, we will see step by step how to add labels/tags and assign them, including some useful tips
See user guide for manually assigning a label
💡 CourseCo’s Product Owner Top Tips
Labels/tags were originally developed to group contacts into a specific groups where the platform would not be able to automatically do this. Examples of reasons as to why you would Label/Tag contacts
Sales - Re-targeting later - apply a tag when someone enquires about a specific course, chase them later to review
Bookings - Bulk booking students into multiple schedules - apply a tag and bulk book your students into a schedule based on their Label/tag
Group Messaging - apply labels to specific contact to bulk email/sms based on their tag
Importing Contacts - apply your tag to the contacts csv import sheet. These tags will be automatically applied to your contacts after you have imported them
A contact can have many tags!
Creating a Tag/ Label via left menu Tags
To create a tag on your project for contacts, please follow the steps below:
Log In as an Admin
In the left menu, click on Contacts
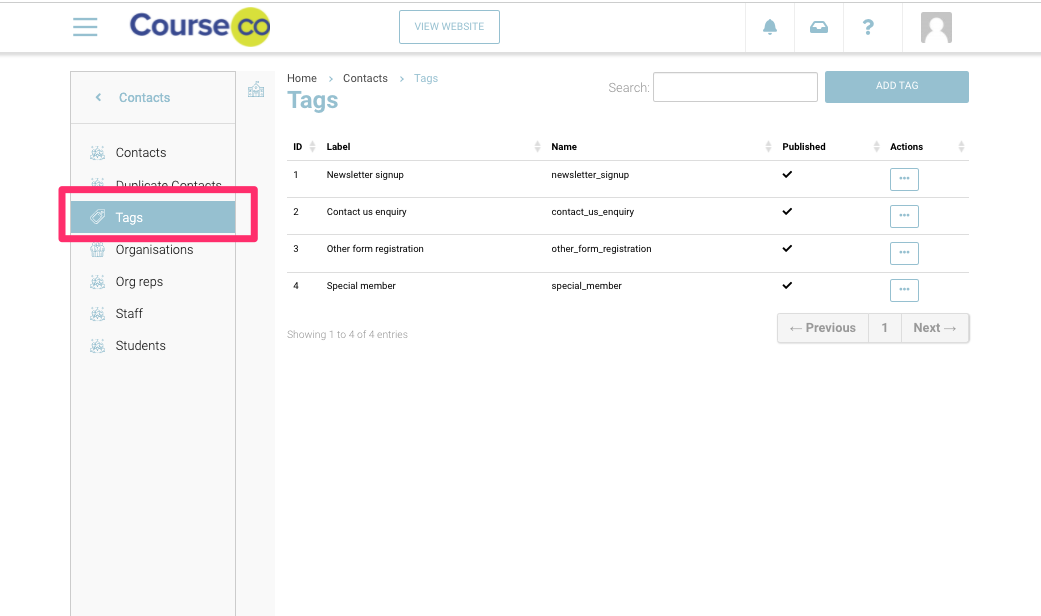
In Contacts menu, click on ‘Tags’

Click on ‘Add tag’ button to add a new tag
Add the Label name in the input field
Add a summary in Name field for the label
Make sure the publish toggle is ON
Click Save button to save the tag
An image is shown below on how creating a tag screen looks like:

Outcome: A new tag will be created which you can assign on your contacts
Bulk Assigning Tags on Contacts
In this section, we will look on how we can bulk assign the label to contacts. To bulk assign tags, follow these steps below:
Log In as an admin
In the left menu, go to Contacts
In the contacts list page, tick the checkbox in front of students that you want to assign a tag
In this image, you can see how multiple students have been selected to assign a tag

Click on ‘Add tag’ button
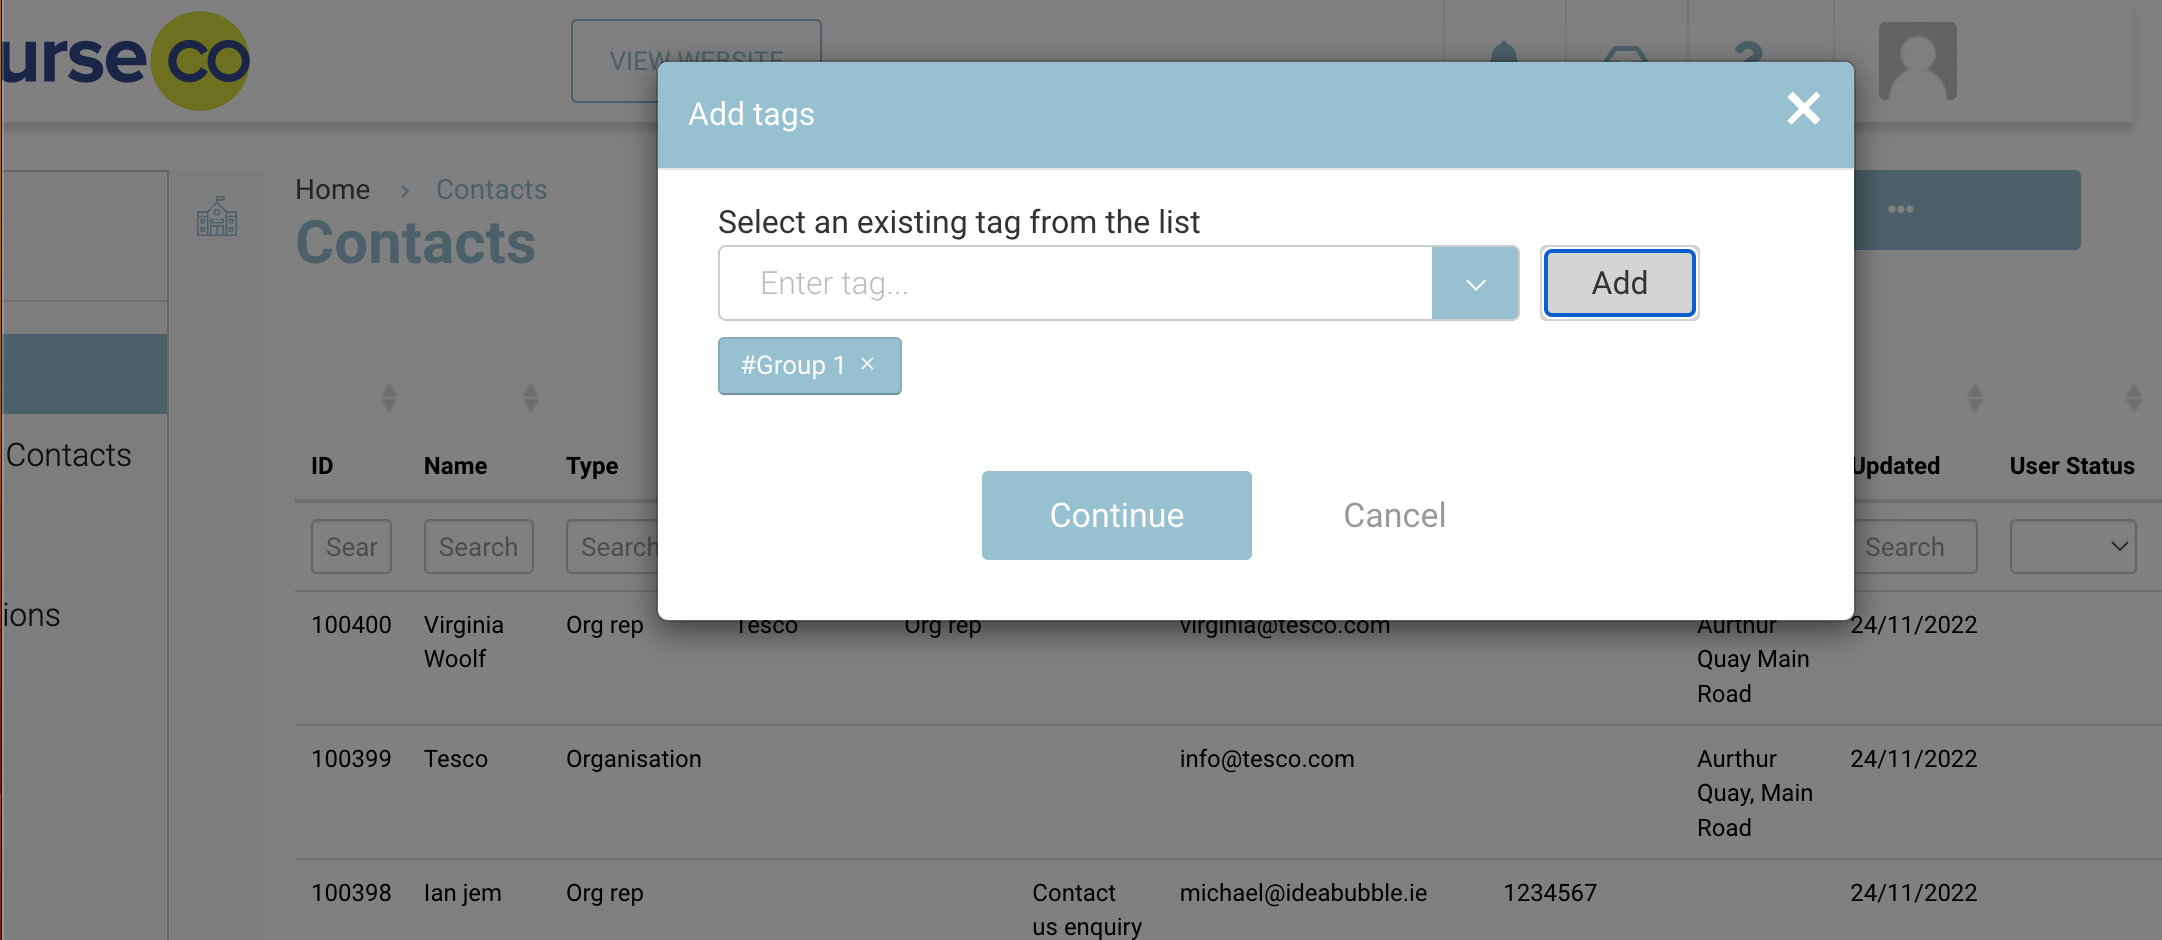
In the dialog box, select tag from the dropdown and click ‘Add’
Click ‘Continue’ button to add the tag on selected contacts
An image below shows how the dialog box for adding tags is displayed on the screen

Outcome: The selected tags will be added as labels on selected contacts.
An image below shows how assigned tags will look like:

Removing Tags from a contact
You can also remove a tag from a contact. To remove a tag from a contact, please follow the steps given below:
Log In as an Admin
In the left menu, click on Contacts
In the Contact menu, click on Tags
In the tag list page, go to the tag that you want to remove from a student
Click on Actions and Select Edit
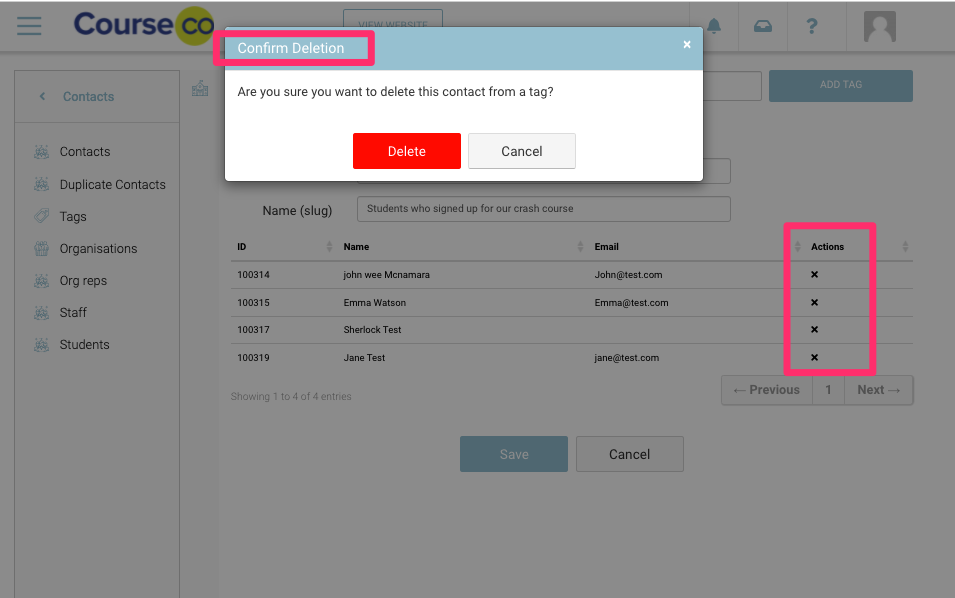
In the tag details, click the x sign in front of the student you want to remove the tag for
Confirm the deletion by clicking on ‘Delete’ button
Outcome: Your student contact will be removed/ unassigned from that tag
An image below represents, how removal of tag on a contact looks like:

Bulk assign tags to contacts
This is a new feature, please review with your CRM lead to get installed
Login as Admin
Open Contacts
Review the far right column - Tags
Ensure you tag exists already - see steps above on adding a tag
Start searching contacts, and tick the far right ‘Tags’ tick boxes
Scroll down to the bottom of the page to see the number of contacts you have ticked
When you have ticked/grouped your contacts, select Add Tags
On the popup, search and select your Tag
You can add multiple tags at this stage

Select Continue
Outcome
Tags have been assigned to all selected contacts
You can navigate to the left menu tags, search and select the tag and view in list form the contacts with this tag
Use the contacts > all screen, Label column to search by Tag.
