Automations Configuration - Booking Confirmation Email
Backoffice Confirmation Email
CourseCo offers automation to trigger emails, to lead bookers for confirming course bookings made by a team member on behalf of students, in the backend.
1. Navigate to the Automations module.
The All automations page will be displayed.
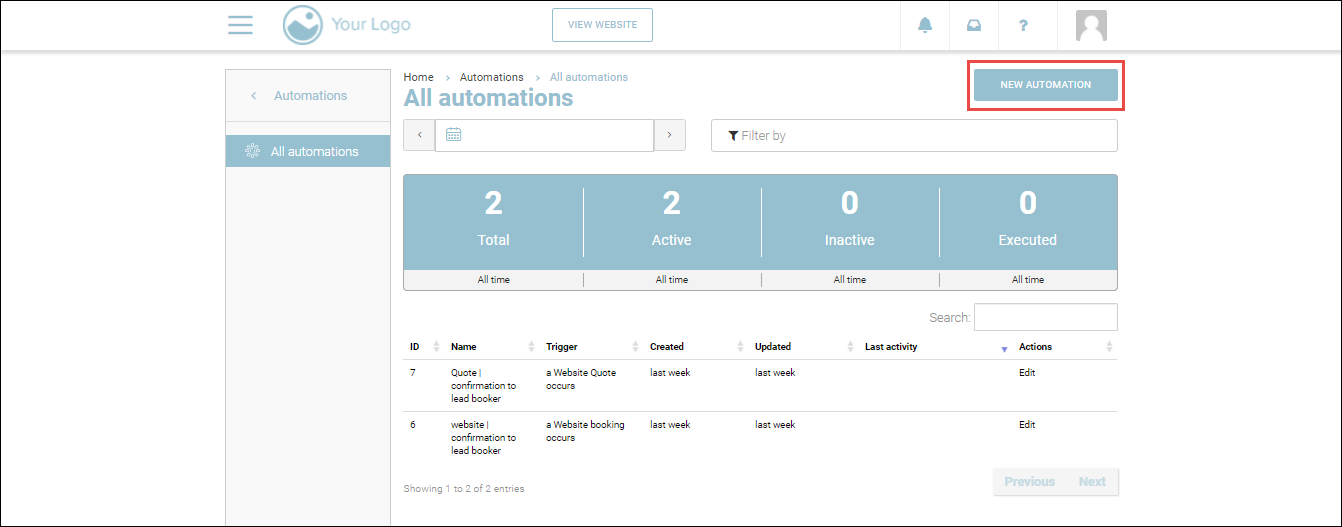
2. Click NEW AUTOMATION.
The New automation page will be displayed.
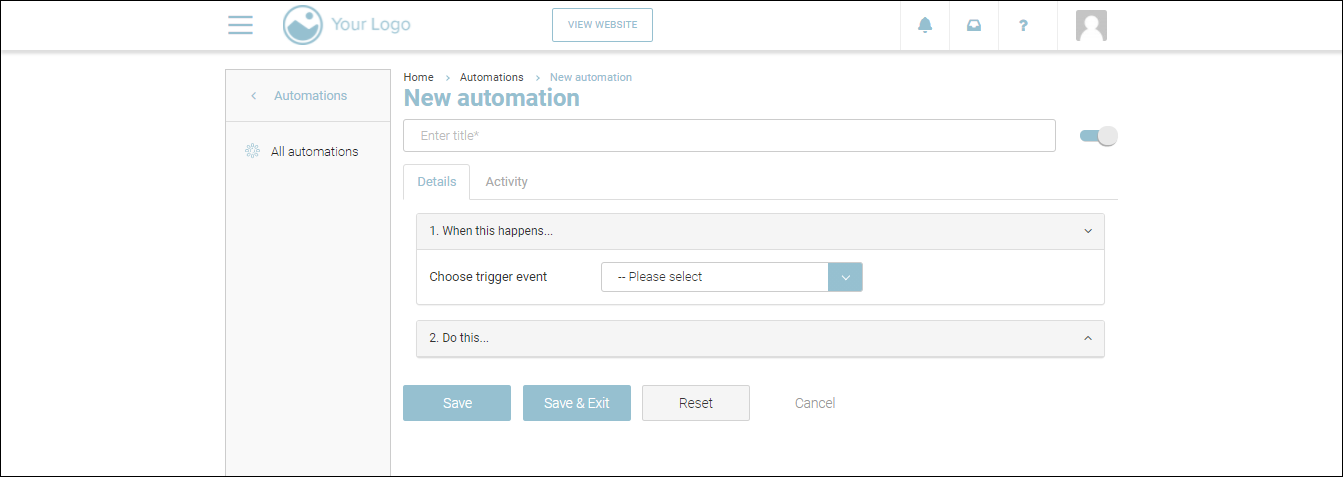
3. Enter a title for the automation in the Enter title field.
4. In the When this happens… section, select the event a back-office Booking occurs from the Choose trigger event dropdown list.
5. In the Do this… section, select the action Send an email from the dropdown list.
6. Click Add action.
The Send email section will be displayed.
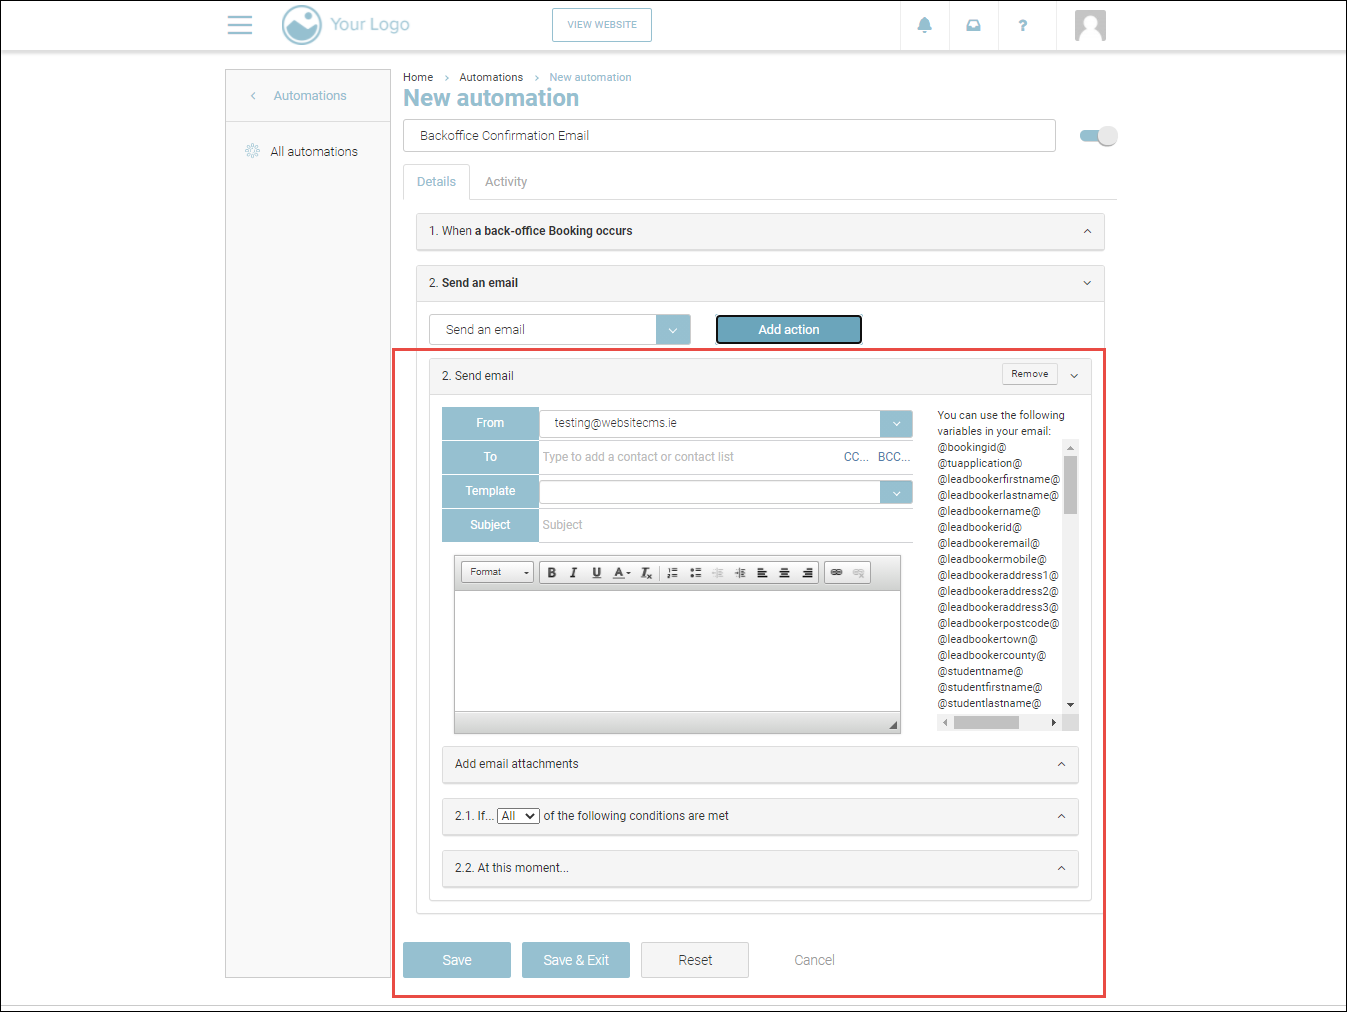
The variables that you can use in your email will be displayed on the right-side of Send email section. You can copy and paste the required variable.
7. In the To field, enter/copy and paste the variable @leadbookeremail@.
8. From the template dropdown list, select the Backoffice booking to leadbooker option.
The Subject and email body fields will be auto-populated.
9. (Optional) To add an attachment to the email, expand Add email attachments section and perform one of the following:
Upload your file: drag and drop the required file from your local system.
Generate and attach: generate the required document and attach it to the email.
Generate and publish to portal: generate the required document and publish it on the portal.
10. To add a conditional expression to trigger the email, expand If…. of the following conditions are met section, select the condition Any, select the variable Booking Type, and click Add condition. Then select the operator IS, select all payment methods
11. In the At this moment… section:
Click the Immediately option to trigger the email immediately
Click the Scheduled option to schedule the triggering. Select the date, time, and frequency at which you want to trigger emails from the corresponding fields. Check the Don’t repeat field if you want the emails to be sent only once.
12. Click Save.
The automation will be added.
Website Confirmation Email
CourseCo offers automation to trigger emails, to leadbookers, for confirming course bookings made by students, on the website.
1. Navigate to the Automations module.
The All automations page will be displayed.
2. Click NEW AUTOMATION.
The New automation page will be displayed.
3. Enter a title for the automation in the Enter title field.
4. In the When this happens… section, select the event a Website booking occurs from the Choose trigger event dropdown list.
5. In the Do this… section, select the action Send an email from the dropdown list.
6. Click Add action.
The Send email section will be displayed.
The variables that you can use in your email will be displayed on the right-side of Send email section. You can copy and paste the required variable.
7. In the To field, enter/copy and paste the variable @leadbookeremail@.
8. From the template dropdown list, select the website booking confirmation leadbooker option.
The Subject and email body fields will be auto-populated.
9. (Optional) To add an attachment to the email, expand Add email attachments section and perform one of the following:
Upload your file: drag and drop the required file from your local system.
Generate and attach: generate the required document and attach it to the email.
Generate and publish to portal: generate the required document and publish it on the portal.
10. To add a conditional expression to trigger the email, expand If…. of the following conditions are met section, select the condition Any, select the variable Booking Type, and click Add condition. Then select the operator IS, select all payment methods
11. In the At this moment… section:
Click the Immediately option to trigger the email immediately
Click the Scheduled option to schedule the triggering. Select the date, time, and frequency at which you want to trigger emails from the corresponding fields. Check the Don’t repeat field if you want the emails to be sent only once.
12. Click Save.
The automation will be added.