Banners | How to update a banner image
This is a step-to-step guide on adding a banner image on the homepage.
Adding Banner image Media
To add a banner image you must first add the image to the ‘Media’ plugin.
To add your banner image to media plugin, please follow these steps:
Log In as an admin
In the left menu, go to Media plugin
In the right corner of your screen, click on ‘Upload Image’ button
Drag and drop or Upload the banner image from your local machine on the dropbox
In the preset dropdown, choose preset as Home Banner
Outcome: Your image will be added as home banner on the media plugin
See uploading image with correct presets user guide for further details
Types of Banner images on Homepage
None - Does not add any banner on the homepage
Static - Adds a static and non moving banner on the homepage
Dynamic - Adds a moving dynamic banner
Custom Sequence - Adds multiple banner images set orderly
Google Map - Embeds google maps as banner on the homepage
Adding Banner to your Homepage
Banner as None i.e. No Banner will display
To add the image you uploaded as None, please follow these steps:
Go to Pages Plugin
In the global search, search and select ‘Home page’ of your website
In the page, go to Banners tab and select Banner type ‘None’ from the dropdown
Click as Save and Publish
To preview the results of ‘none’ type banner on your homepage, click on Preview tab of the page
Outcome: No banner will be added on your homepage and it will be blank
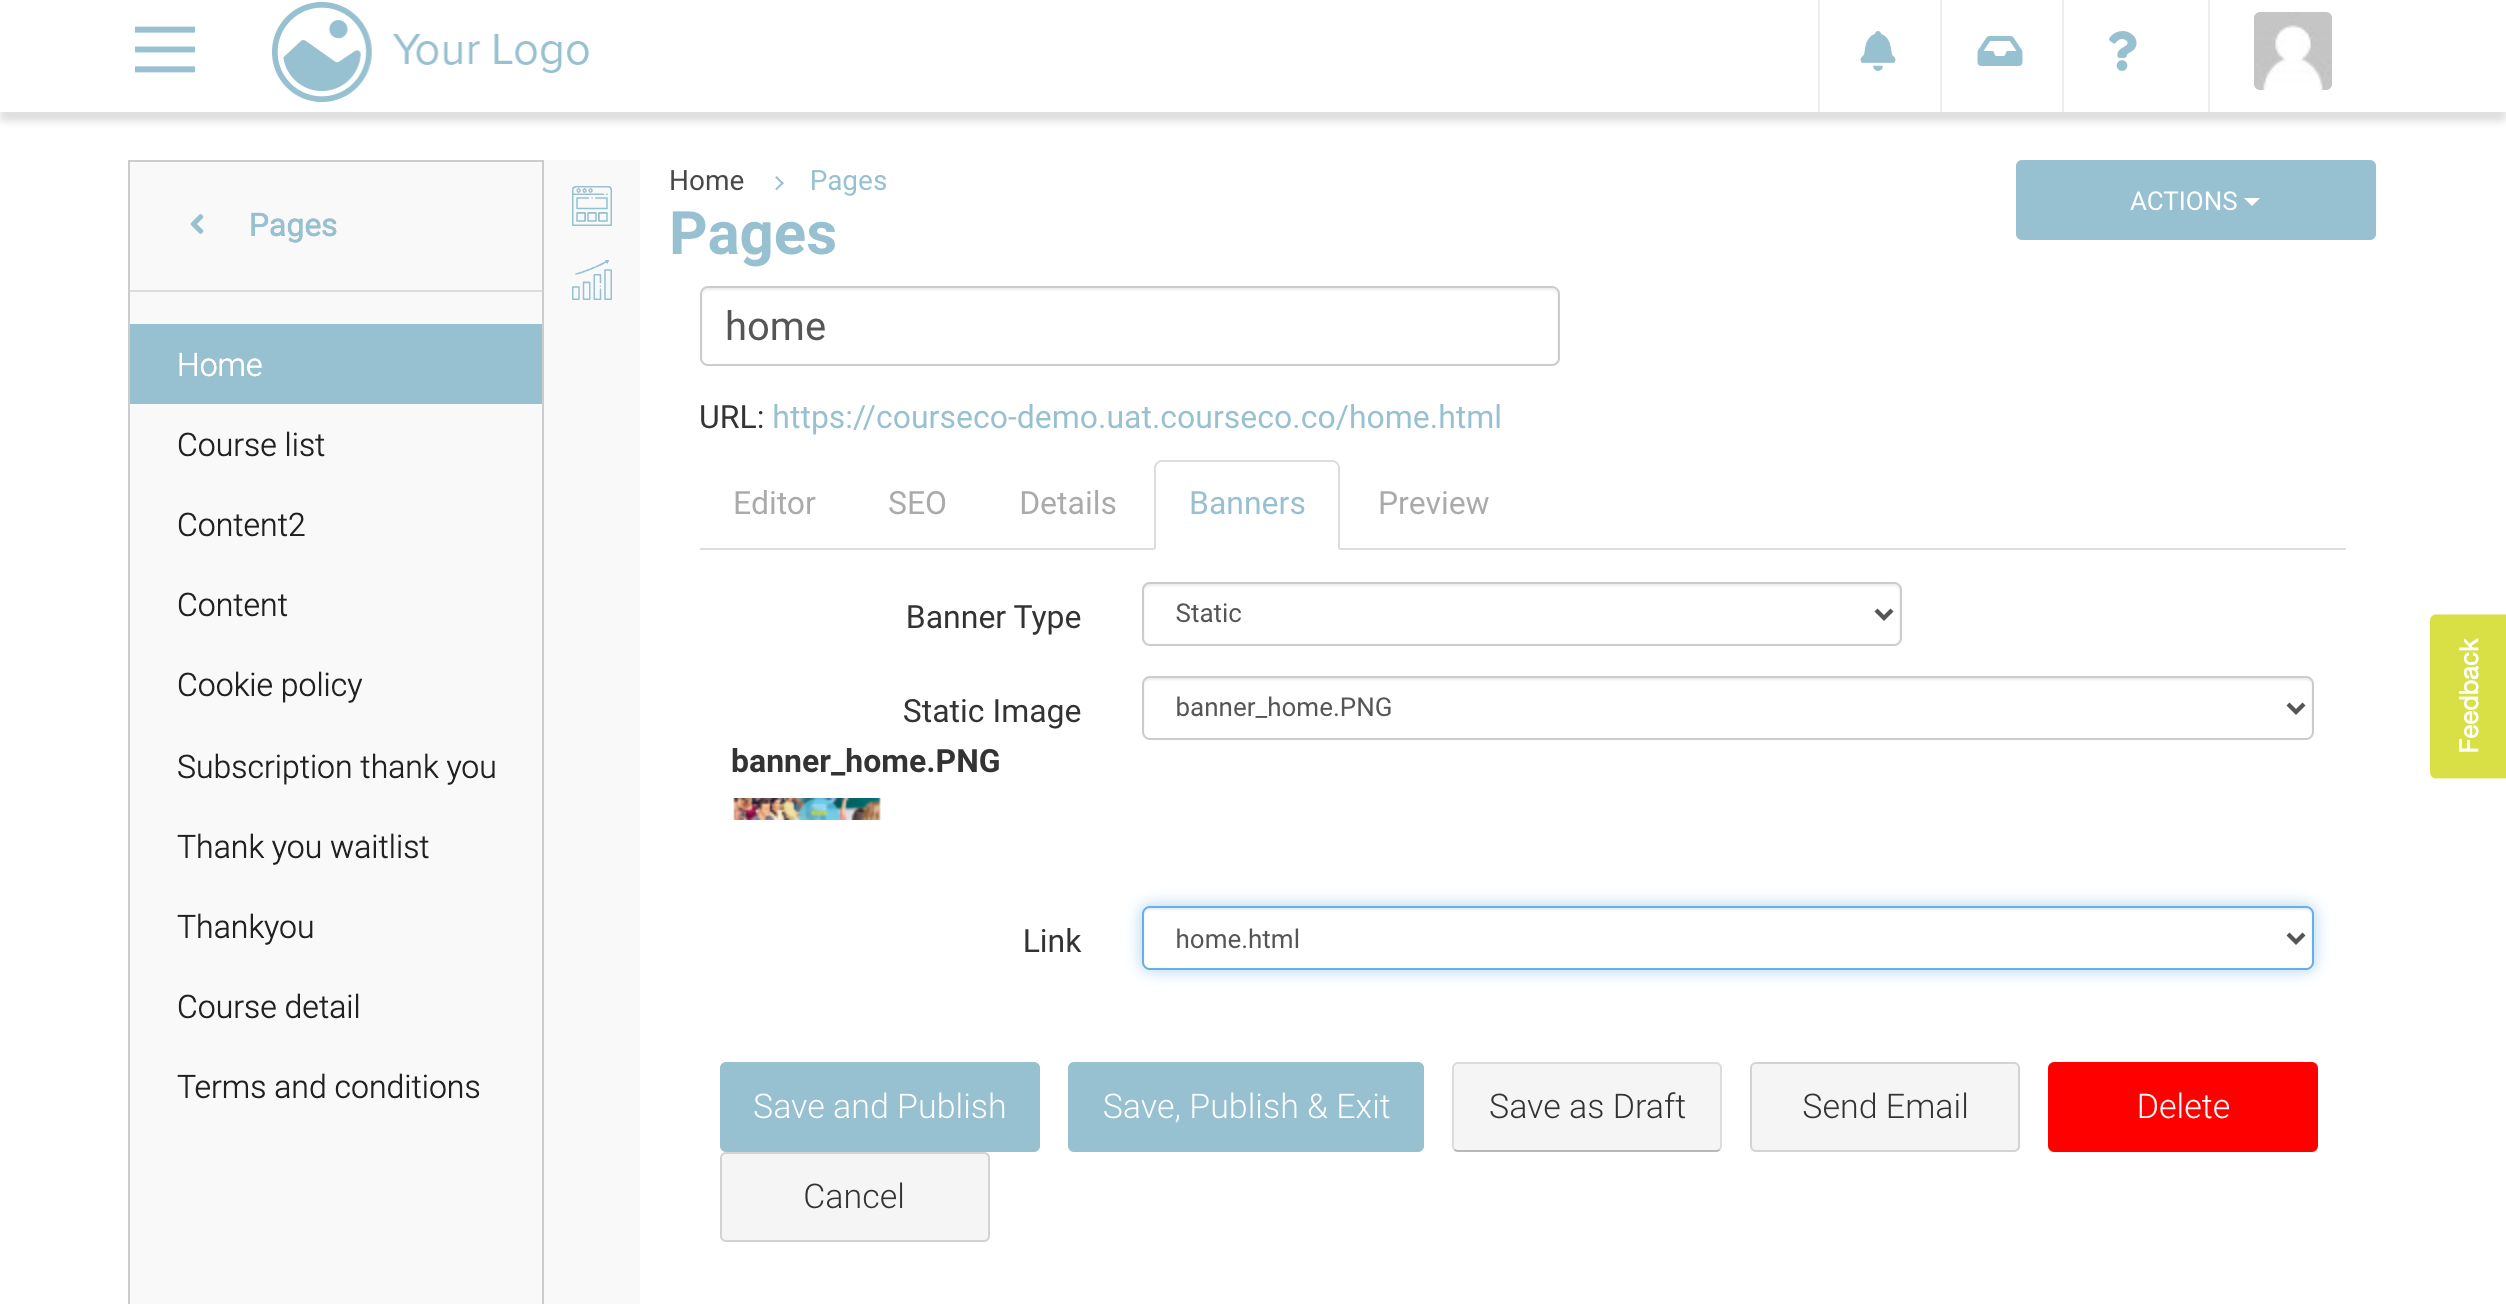
Banner as Static
To add the image you uploaded as a Static banner, please follow these steps:
Go to Pages Plugin
In the global search, search and select ‘Home page’ of your website
In the page, go to Banners tab and select Banner type as ‘Static’ from the dropdown
Select the image name from static image dropdown input
Note: If you do not see the banner in the dropdown, you did not upload to the media folder with the correct preset - see user guide for full details
In the Link dropdown, select the link of homepage
Click Save and Publish
The image name will appear as you added on the ‘Media’ plugin
Go to Preview tab, to see how the page will look on the frontend
Banner as Dynamic
To add the image you uploaded as a Dynamic banner, please follow these steps:
Go to Pages Plugin
In the global search, search and select ‘Home page’ of your website
In the page, go to Banners tab and select Banner type ‘Dynamic’ from the dropdown
Select the image name from dynamic image dropdown input
In banner sequence dropdown, select your image for the home banner
In display order, choose ascending or descending or random as you wish for them to appear
In first image dropdown, you will see you banner image added
In the link dropdown, select home page link
Click Save
The image name will appear as you added on the ‘Media’ plugin
Go to Preview tab, to see how the page will look on the frontend
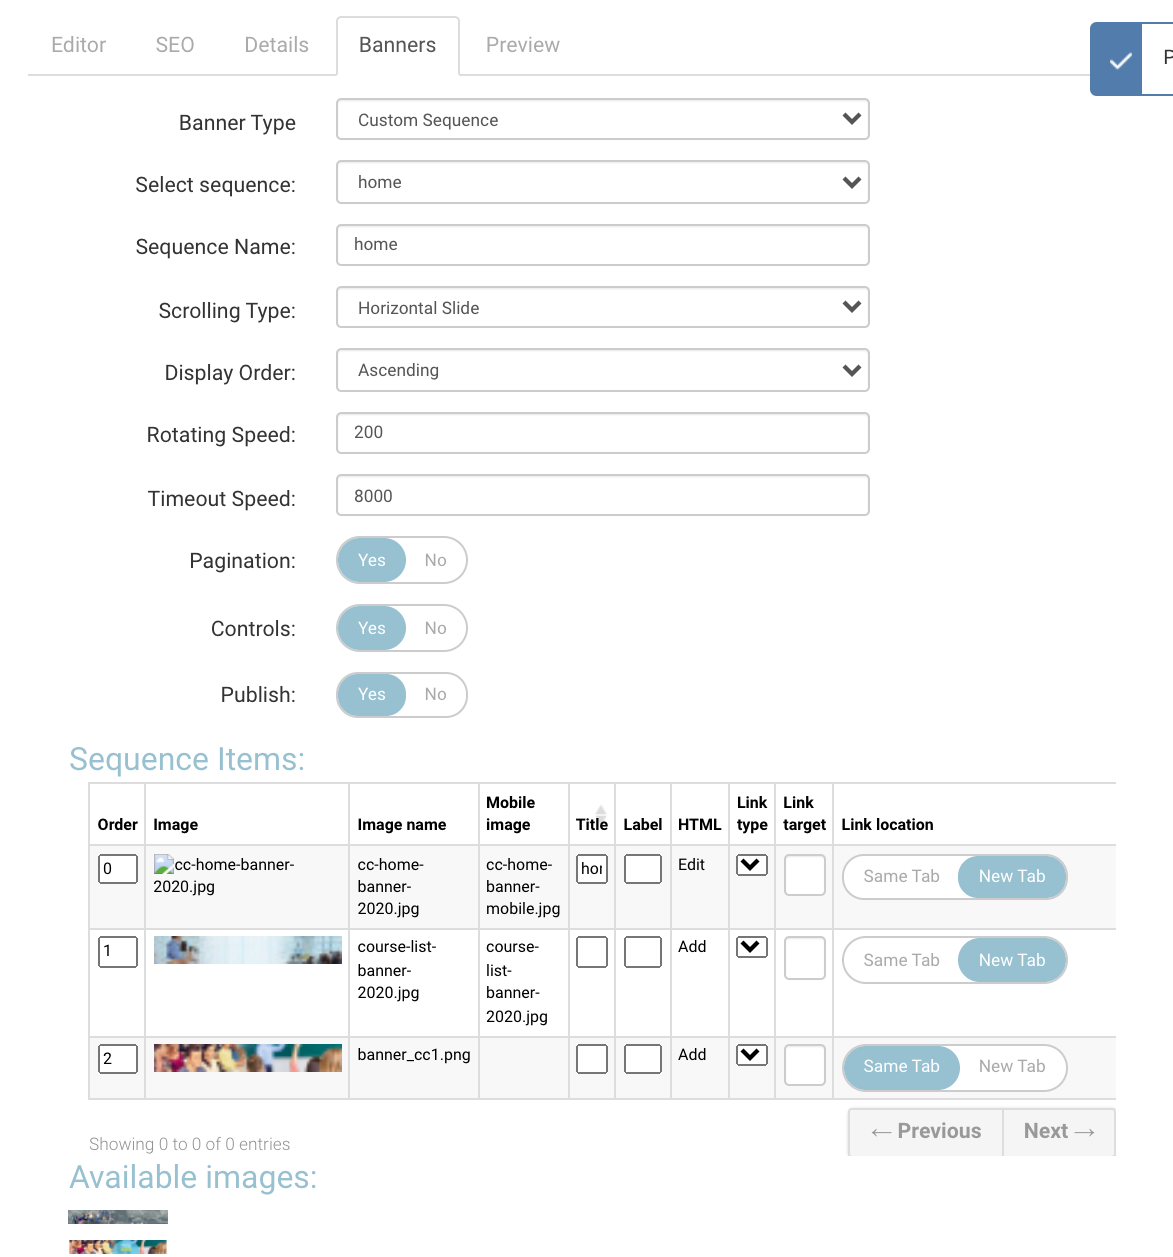
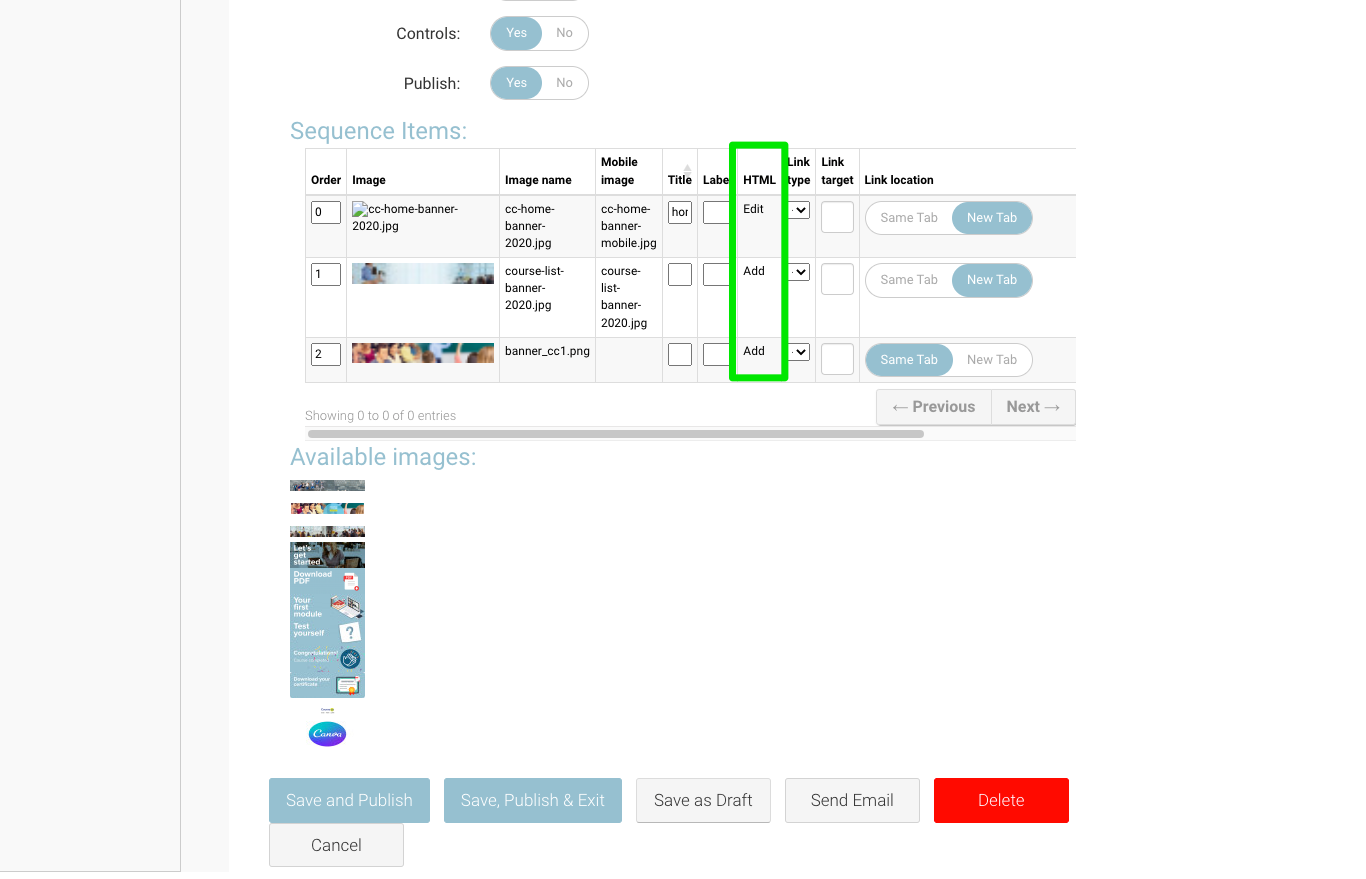
Banner as Custom Sequence i.e Moving Banner with text
To add the image you uploaded as a Custom Sequence banner, please follow these steps:
Go to Pages Plugin
In the global search, search and select ‘Home page’ of your website
In the page, go to Banners tab and select Banner type as ‘Custom Sequence’ from the dropdown
Select sequence as ‘Home’ in the select sequence dropdown
Enter a name for your sequence in sequence name input
Select Scrolling type as fade, horizontal or vertical for animation style of the banner as you want
Select display order as ascending, descending or random as you want for home banner
Enter rotating or timeout speed for the banner
You can also ignore these inputs for rotating and timeout to save it as by default
Turn ON the toggle for Page control, if required - toggle no by default
Turn ON the publish page toggle
Now in the available image section choose the images in order of what you want to see in home page
In pop-up for the image, click on Add image to the sequence
Similarly add another banner image to the group
Click on Save and Publish
The image name will appear as you added on the ‘Media’ plugin
Go to Preview tab, to see how the page will look on the frontend
Adding text to a Banner
Within the Sequence Items section, navigate to the select banner
On the HTML Column, select Add or EDIT
In the Pop Up screen you will see a text input section, here you can add you banner text
You can left/right align
Add Heading 1, Heading 2… style
Hyper link the text
Select Update Sequence Item to save
Now select Save and Publish
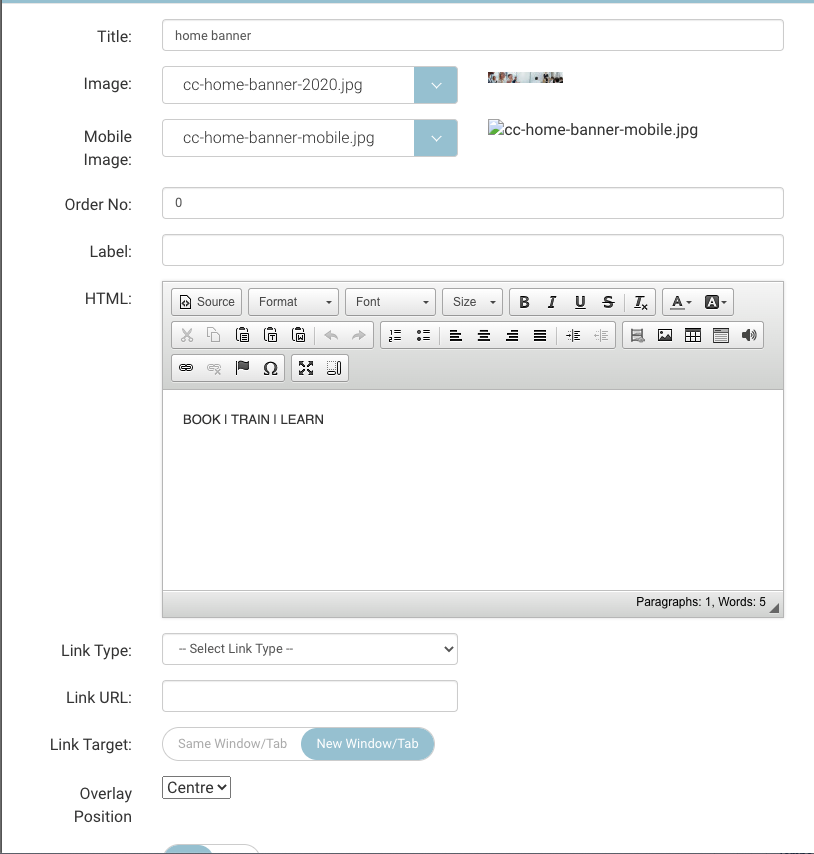
Adding a Mobile Banner
In the media plugin, Upload your mobile image with the preset ‘Mobile Banner’
Go to uploading media user guide for more detailsGo to the pages plugin and select your page
Navigate to the banner tab
Within the Sequence Items section select EDIT on the HTML column
In the popup, select your Mobile Image from the dropdown
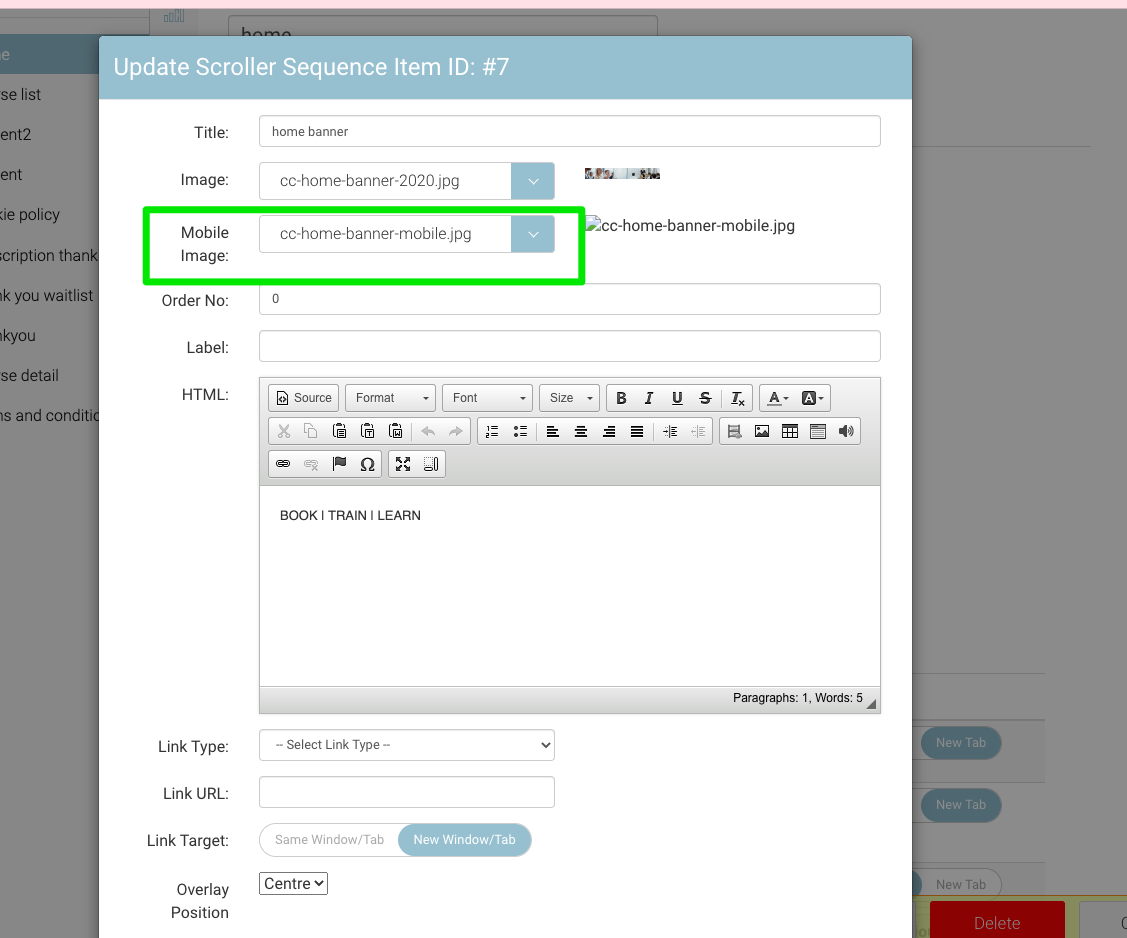
Select Update Sequence Item to save
Now select Save and Publish